The Ultimate Guide to Home Hardening Against Wildfires
Get practical tips for home hardening against wildfires. Learn how to protect your home from embers, choose fire-resistant materials, and create defensible space.
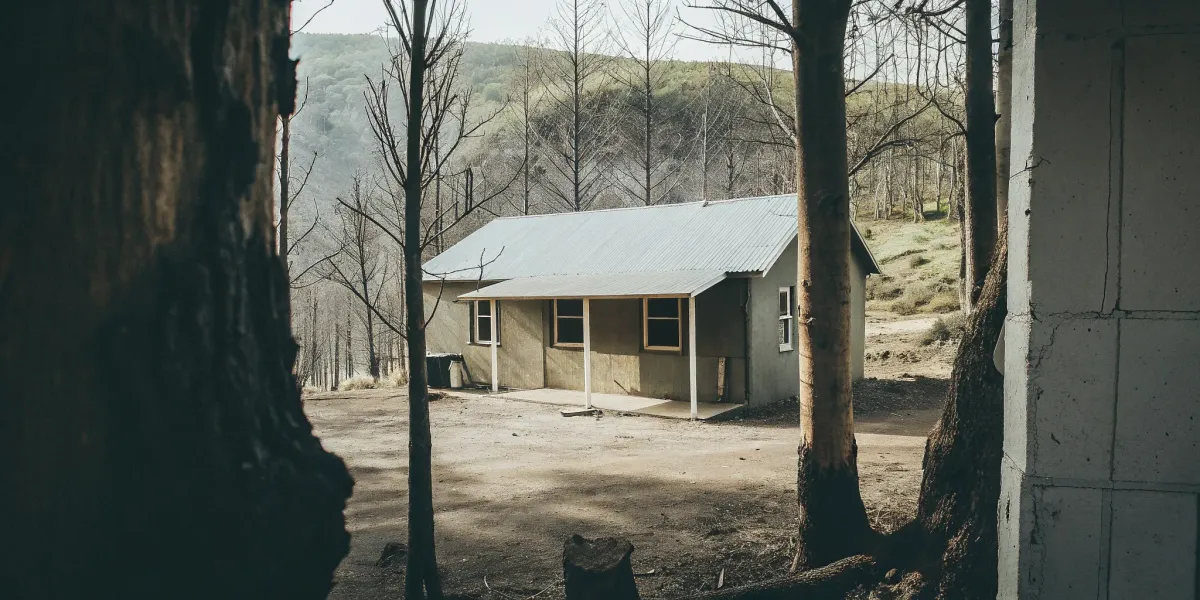
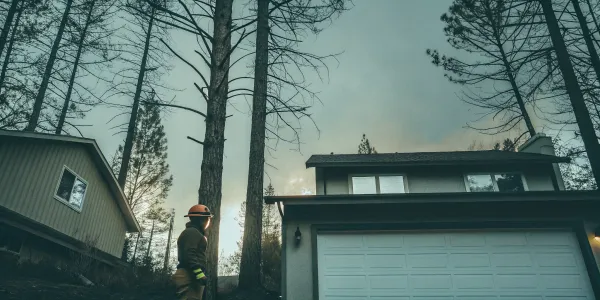
A wildfire’s greatest weapon is its ability to find your home’s weakest link. The real danger isn't always the wall of flames, but the tiny, glowing embers that invade through the smallest openings—an unscreened attic vent, a gap under a door, or a crack in your siding. To protect your home, you have to think like an ember, searching for any entry point that could turn a stray spark into a disaster. This is the core of home hardening against wildfires. I'll show you exactly how to spot and seal these vulnerabilities to make your home more resilient.
Key Takeaways
- Focus on Embers, Not the Fire Front: The biggest threat to your home isn't a massive wall of flames, but tiny, wind-blown embers. Your most effective defense is to remove flammable debris from the immediate five feet around your foundation and seal small gaps where embers could get inside.
- Combine Defensible Space with Home Hardening: Create layers of protection by managing the two most important areas. First, clear and maintain the 100-foot zone around your house to slow a fire's approach. Second, upgrade the structure itself with fire-resistant materials to repel any embers that reach it.
- Start with Small, High-Impact Fixes: You don’t have to do everything at once. Begin with low-cost weekend projects like cleaning your gutters and screening vents, which directly counter the main threat from embers. From there, you can strategically plan for larger upgrades over time.
How Wildfires Actually Threaten Your Home
When you picture a wildfire, you probably imagine a massive wall of flames. While that's part of the story, it’s not how most homes are actually lost. The real danger is often much smaller and sneakier. Understanding how a wildfire truly threatens your property is the first step in protecting it. It’s less about building a fortress against a giant fire front and more about managing the small details that make your home vulnerable. By shifting your focus from the distant flames to the area right around your house, you can take practical steps to improve its chances of survival.
The Triple Threat: Embers, Radiant Heat, and Direct Flames
A wildfire attacks your home in three ways: with embers, radiant heat, and direct flames. While we often picture a towering wall of fire, the most persistent enemy is actually embers—tiny, glowing pieces of burning vegetation carried by wind for over a mile. These airborne arsonists land in gutters or get sucked into vents, starting new fires long before the main blaze arrives. The second threat is radiant heat, an intense wave of heat that can melt siding and ignite materials without direct contact. Finally, direct flames usually only become a problem after embers or radiant heat have already ignited nearby fuel like fences or trees. By understanding this wildfire behavior and making your home ignition-resistant, you can counter the primary threats before they escalate.
What Really Causes a Home to Burn?
The primary culprit behind most homes lost to wildfire isn't direct contact with the main fire. Instead, it's the storm of burning embers, or firebrands, that the fire sends ahead of it. These small, wind-blown pieces of burning wood and vegetation can travel a mile or more, landing on or near your house. If an ember finds something easy to ignite—like dry leaves in a gutter, a pile of firewood stacked against the wall, or even a doormat—it can start a new fire. Research shows that ignitions within the first five feet of a home are the most critical to prevent. This is why creating a non-combustible "immediate zone" right around your foundation is one of the most important actions you can take.
Wildfire Myths You Need to Stop Believing
Let's clear up a few common misunderstandings about wildfires. One of the biggest myths is that a massive wall of flames is what destroys most homes. As we've seen, embers are the more likely cause. Another dangerous assumption is that your insurance policy will automatically cover a complete rebuild if your home is destroyed. Policies vary, and coverage limits might not keep up with rising construction costs. The most empowering truth is that you have more control than you think. Focusing on home hardening and managing the 100 feet around your property is often more important for its survival than efforts to control the wildfire itself.
Why Embers Are the Biggest Wildfire Threat
Think of embers as tiny, flying torches searching for fuel. A wildfire can launch thousands of them into the air, and they can find their way into the smallest nooks and crannies of your property. They can get trapped in unscreened vents, under decks, or in the corners of your roof. According to fire safety experts, these wind-blown embers are the main reason homes ignite. Your home's survival often comes down to whether these embers land on something flammable when they arrive. By paying close attention to vulnerable spots and removing combustible materials, you can dramatically reduce your home's risk of being destroyed by wildfire.
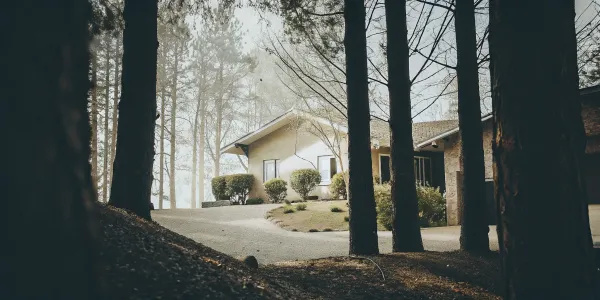
How to Create Your Defensible Space
Creating defensible space is one of the most effective actions you can take to protect your home from a wildfire. Think of it as a buffer zone you create between your house and the surrounding vegetation. This space is designed to slow or stop the spread of wildfire and protect your home from catching fire—either from direct flame contact or radiant heat. The process of hardening your home and the surrounding 100 feet is often more important for its survival than controlling the fire itself. By carefully managing this area, you give firefighters a safer space to defend your property.
Start Here: Securing the Immediate Zone (0-5 Feet)
This five-foot perimeter right against your home is the most critical area to manage. It’s your last line of defense against embers, which are the primary cause of home ignition during a wildfire. As the NRDC notes, you should be "working from the home outward" because preventing ignitions within this zone is paramount. Start by removing anything combustible. This includes clearing all dead leaves, pine needles, and dry grass from under your deck and in your gutters. Use non-flammable materials like gravel, pavers, or concrete for walkways and landscaping beds directly adjacent to your foundation. Move firewood piles and flammable patio furniture at least 30 feet away from all structures.
Next: Clear the Intermediate Zone (5-30 Feet)
In the space between 5 and 30 feet from your home, the goal is to interrupt a fire’s path and keep flames small. Most homes are destroyed when burning embers land on something easy to ignite nearby. Your job is to remove those potential ignition points. You can do this by creating "islands" of well-spaced vegetation. Keep your lawn mowed to a maximum height of four inches and rake up fallen leaves and twigs regularly. Prune trees to keep branches at least six feet from the ground to eliminate ladder fuels that can carry a ground fire up into the tree canopy.
Maintain Your Extended Zone (30-100 Feet)
This outer ring of defense extends from 30 feet to at least 100 feet from your home, or to your property line. The objective here isn’t to clear the land completely but to reduce the energy and speed of an approaching wildfire. Thin out dense vegetation by removing dead trees, dry shrubs, and undergrowth. Ensure there is adequate horizontal space between the canopies of mature trees—a good rule of thumb is at least 10 feet. By managing the fuel load in this zone, you can significantly decrease the intensity of a fire and prevent it from reaching your home with destructive force.
Managing Sheds and Outbuildings
Your shed isn't just for storing tools; during a wildfire, it can become a significant source of fuel that endangers your home. Treat your outbuildings with the same care you give your house by creating a dedicated defensible space around them. Start by clearing a 10-foot, ember-resistant zone around the base of each structure, removing all flammable vegetation and debris. If you're in the market for a new shed, choose one made from metal or other fire-resistant materials. For existing wooden sheds, their distance from your home is critical. According to CAL FIRE guidelines, combustible sheds should be at least 30 feet away from your house, with larger structures requiring even more distance to prevent flames from spreading.
Securing Other Flammable Items (RVs, Boats, etc.)
Large items like RVs, boats, trailers, and even piles of building materials can act like kindling for an approaching fire. Just like a shed, these items need to be managed carefully. The best practice is to park them at least 30 to 50 feet away from your home, especially if they are larger than 120 square feet. Clear a five-foot non-combustible zone around them to stop embers from igniting nearby grass or leaves and spreading to the vehicle. If you have old, unused flammable structures or vehicles on your property, consider removing them entirely. The fewer flammable targets you have, the more you reduce your overall risk and simplify your defensible space maintenance.
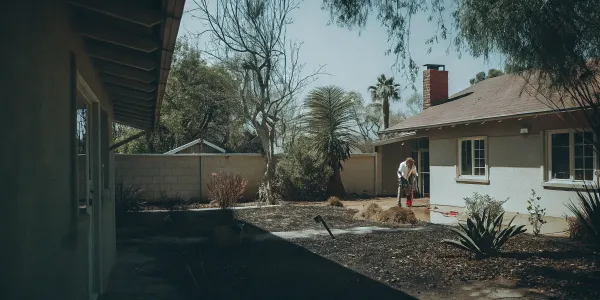
How to Choose Fire-Resistant Landscaping
Your landscaping choices play a huge role in your home’s defense. Reducing your home's vulnerability to ember ignition will dramatically increase its chances of surviving a wildfire. Opt for high-moisture plants that are less likely to burn, such as succulents or native perennials. Avoid plants that are oily, resinous, or tend to accumulate dead material, like juniper, cypress, and some pines. When planting, arrange vegetation in small, spaced-out clusters to prevent fire from spreading continuously across your yard. Remember, even fire-resistant plants require regular maintenance, including watering and removing dead leaves and branches, to keep them healthy and safe.
Strengthen Your Home with Fire-Resistant Materials
Creating defensible space is your first priority, but the materials your home is made of form its last line of defense. Think of it as strengthening your home’s armor. When wind-blown embers land on or near your house, the right building materials can be the difference between a close call and a catastrophe. Hardening your home doesn’t always require a complete renovation; many of these upgrades can be tackled over time. By focusing on the most vulnerable parts of your home—like the roof, windows, and decks—you can significantly reduce the chances of ignition and give your property a fighting chance.
What Does "Ignition-Resistant" Mean?
Making your home "ignition-resistant" means it's built and maintained to withstand the primary threat of a wildfire: embers. It’s not about being completely fireproof, but about making it incredibly difficult for a stray spark to catch. This process, often called home hardening, focuses on two key areas: the materials your home is made of and the small details that prevent ember entry. It means using things like composite roofing and fiber-cement siding, but it also means sealing gaps under doors and screening vents. Most homes are lost not to the main fire front, but to these wind-blown embers finding a weak spot. An ignition-resistant home is one where those weak spots have been systematically addressed.
Is Your Roof Fire-Resistant?
Your roof is the single most vulnerable part of your home during a wildfire because it presents a large, flat target for falling embers. If you have a roof made of combustible materials like wood shakes, it’s a serious liability. The best thing you can do is invest in a Class A fire-rated roof. According to the Texas Wildfire Risk Assessment Portal, using fire-resistant roofing materials such as metal, tile, or asphalt shingles can dramatically lower the risk of your home catching fire. These materials are designed to resist ignition from embers, preventing a stray spark from turning into a full-blown house fire. It’s a significant investment, but one that provides foundational protection for everything underneath it.
Don't Forget Skylights
Skylights are a fantastic way to bring natural light into your home, but they can also be a vulnerability during a wildfire. Just like your main roof, they need to be ember-resistant. If you have skylights, check to ensure they are made of tempered glass, which is much stronger and more resistant to shattering from extreme heat than standard glass. Additionally, they should be protected by metal mesh screens with openings no larger than 1/8 inch. This screen acts as a crucial barrier, preventing embers from landing directly on the glass or entering your home if the glass were to break. It’s a small detail that makes a big difference in securing your roofline.
Seal Gaps Under Roof Tiles
Certain roofing styles, like Spanish or barrel tiles, create natural gaps where the tiles curve. While beautiful, these openings are perfect collection points for wind-blown embers, which can smolder undetected and ignite the underlying roof structure. It's essential to close these gaps using bird stops, weather blocking materials, or other non-combustible fillers designed for this purpose. This simple fix prevents embers from getting trapped in these vulnerable spaces. And, as always, keep your entire roof surface clear of flammable debris like pine needles and leaves, which can act as kindling for any embers that land there.
Strengthening Your Home's Windows and Doors
The intense heat from a nearby wildfire can cause single-pane windows to break, allowing embers and flames to enter your home. Doors with thin panels or single-pane glass inserts are also weak points. To protect these openings, CAL FIRE recommends installing dual-pane windows with tempered glass, which is much stronger and more resistant to shattering from heat. Pairing them with noncombustible metal frames adds another layer of protection. For doors, choose solid-core models or those with a tested fire-resistance rating. Sealing any gaps around window and door frames with fire-rated caulk also helps keep embers out. These upgrades not only protect your home from fire but can also improve its energy efficiency.
Limit Windows Facing Vegetation
The placement of your windows matters just as much as their construction. Large windows facing dense trees or shrubs can become major vulnerabilities during a wildfire due to intense radiant heat, which can cause glass to break even without direct flame contact. When planning a renovation or building a new home, consider reducing the number and size of windows that look out onto heavily vegetated areas. For existing homes, this highlights the importance of maintaining excellent defensible space in those specific zones. CAL FIRE’s guide on hardening your home also recommends using double-pane windows, with at least one pane made of tempered glass, to better resist breaking under high heat.
Upgrade to Metal Screen Doors
Your screen doors are another potential weak spot that embers can easily exploit. Many standard screen doors are made with flammable vinyl or plastic mesh that can melt and ignite when exposed to embers, potentially carrying fire to your door frame and siding. It’s a simple swap, but an important one. Fire safety experts recommend you replace these with screens made of noncombustible metal mesh. This is a relatively inexpensive and straightforward upgrade that effectively closes off a common entry point for embers, adding a crucial layer of protection to your home’s exterior without a major renovation.
Choose Fire-Resistant Siding
Your home's siding is its skin, and it’s the first line of defense against external threats. During a wildfire, embers can get trapped in cracks or ignite flammable siding directly. If your home has wood or vinyl siding, it’s more vulnerable. The best long-term solution is to replace it with noncombustible materials. However, that’s a big project. A more manageable first step is to focus on the area most exposed to ground fire and accumulating embers. Consider replacing just the bottom two feet of your siding with a fire-resistant option. This simple change creates a critical barrier where your home is most likely to encounter flames or a buildup of smoldering debris, giving the entire structure a better chance of survival.
Examples of Fire-Resistant Siding
When you're ready to upgrade, you have several excellent choices for fire-resistant siding. Materials like stucco, fiber cement, and brick are all noncombustible and provide a high level of protection. Some specially treated wood products are also designed to resist ignition. The key is to ensure these materials provide continuous coverage from the foundation all the way up to the roof eaves. This prevents embers from finding a weak spot in a gap or transition between materials. Choosing one of these durable options not only hardens your home against wildfire but can also add to its long-term value and durability.
A Cost-Effective Siding Retrofit
A full siding replacement isn't always in the budget, but that doesn't mean you can't make meaningful improvements. You can significantly harden your home by simply maintaining the siding you already have. Take a walk around your house and look for any gaps, holes, or areas with rot, especially where siding meets the foundation or trim. Sealing these openings with fire-rated caulk and replacing damaged boards can prevent embers from getting inside your walls. This is a cost-effective weekend project that directly addresses the threat of ember intrusion, making your home much safer without a major renovation.
Secure Your Chimney
A chimney might seem like it's built to handle fire, but an open, unscreened chimney is like a welcome mat for flying embers. During a wildfire, embers can easily fly down the flue and ignite soot buildup or even enter your living room. The fix is straightforward and essential. You need to install a spark arrester, which is a metal screen that covers the top of the chimney. Make sure the mesh openings are between 3/8 and 1/2 inch—small enough to block embers but large enough to let smoke escape properly. Additionally, get into the habit of closing the fireplace flue when it's not in use, especially during fire season, to add another layer of protection.
Building Safer Decks, Patios, and Fences
Wooden decks and fences attached to your home can act like fuses, carrying fire directly to your exterior walls. To prevent this, it’s crucial to rethink how these structures are built and maintained. CAL FIRE suggests creating a 5-foot ember-resistant zone under and around your deck using non-combustible materials like gravel or concrete. This simple step prevents embers from igniting debris underneath. When it’s time to replace deck boards, choose fire-resistant composite or treated wood. For fences, consider using metal gates or replacing the first five feet of fencing that attaches to your house with a noncombustible material to create a critical fire break.
Install Metal Flashing Where the Deck Meets the House
The small gap where your deck connects to your house is a prime spot for embers to get trapped. Over time, this area collects leaves, pine needles, and other flammable debris, creating a perfect ignition point. To seal this vulnerability, install a strip of noncombustible metal flashing that covers the joint. This simple barrier prevents embers from lodging against your siding and igniting hidden debris. It’s a critical detail that stops your deck from becoming a direct pathway for fire to reach the exterior of your home, effectively severing a common and dangerous link in the chain of ignition.
Clear the Area Under Your Deck
The space underneath your deck is an often-overlooked but extremely hazardous area. It’s a natural trap for wind-blown embers and flammable debris like dry leaves and grass. You need to treat this space as part of your home’s immediate five-foot noncombustible zone. Start by thoroughly cleaning out everything from underneath your deck. Then, lay down a layer of gravel, pavers, or concrete to create a surface where embers can’t find fuel. This simple weekend project removes a major fire hazard and ensures that a stray ember landing under your deck has nothing to burn.
Use Fire-Resistant Patio Covers
A patio cover is essentially an extension of your roof, and it needs to be just as fire-resistant. Embers don't distinguish between your main roof and an attached cover, making flammable materials like wood or fabric a significant liability. When building or replacing a patio cover, you should use the same fire-resistant materials you would for your roof, such as metal, tile, or other Class A-rated options. This ensures you have a continuous, noncombustible shield protecting the areas closest to your home, preventing a small fire on your patio from spreading to the main structure.
Create a Barrier for Awnings and Carports
Attached structures like awnings and carports can act as fuses, carrying fire directly to your house. It’s important to create a fire break where they connect to your exterior walls. You can do this by installing a noncombustible barrier, such as a 12-inch vertical section of metal or stucco siding, between the structure and the rest of your wall. Just as importantly, keep these areas clear of any flammable materials. Remove climbing plants, stored items, and outdoor furniture from underneath them to eliminate any potential fuel that could be ignited by embers.
Stop Embers with Vents and Gutter Guards
Vents in your attic, crawlspace, and foundation are necessary for airflow, but they can also be open invitations for embers. These tiny firebrands can easily fly into vents and ignite flammable materials inside. To secure these openings, the Texas Wildfire Risk Assessment Portal advises you to install a metal screen with a mesh of 1/8-inch or smaller behind all vents. This blocks embers while still allowing air to circulate. Similarly, gutters filled with dry leaves and pine needles are like kindling waiting for a spark. The Los Angeles Fire Department notes that using metal gutter guards can keep this debris out, removing a key fuel source from the edge of your roof.
Choose the Right Vent Screens
When it comes to stopping embers, the material and size of your vent screens are everything. Standard fiberglass or plastic screens, like the ones you might have on your windows, will melt when exposed to the intense heat of a wildfire, creating an open pathway for embers to enter your home. The solution is to use metal mesh screens with openings of 1/8-inch or smaller. This fine mesh is small enough to block tiny, wind-driven embers but large enough to maintain proper airflow, which is essential for preventing moisture buildup in your attic and crawlspace. Upgrading your vent screens is a small change that provides a critical layer of defense against ignition.
Why You Should Hire a Professional for Vent Installation
While swapping out vent screens might seem like a straightforward DIY project, it’s one of those jobs best left to an expert. Your home’s vents are a carefully designed part of its overall ventilation system. Installing the wrong type of screen or fitting it improperly can restrict airflow, potentially leading to moisture problems, mold, or even decreased efficiency for your heating and cooling systems. A qualified contractor will ensure the new screens meet local building codes and are installed correctly without compromising your home's ventilation. For peace of mind and to ensure the job is done safely, it's always a smart move to hire a professional for this critical home hardening task.
Where is Your Home Most Vulnerable?
Creating defensible space and choosing fire-resistant materials are huge steps, but the tiny details can make all the difference. A wildfire’s greatest threat often comes from wind-blown embers, which are small, glowing pieces of burning wood or vegetation that can travel a mile or more ahead of the fire. These embers act like tiny invaders, searching for any small opening to enter and ignite your home from the inside. Securing your home’s weak spots is about sealing these entry points and hardening the vulnerable areas that embers love to target.
Find and Seal Gaps Where Embers Can Enter
Think of your home as a protective shell. Any crack or gap, no matter how small, is a potential entry point for a fire-starting ember. Research shows that the vast majority of structure loss during a wildfire is due to embers. Your mission is to find and seal these gaps. Walk the perimeter of your home and look for openings where pipes and wires enter, check the foundation for cracks, and inspect the areas where different siding materials meet. Use caulk, weather-stripping, and other sealants to close off any potential entryways. It’s a meticulous job, but it’s one of the most effective ways to protect your home.
Are Your Eaves and Soffits Protected?
Eaves—the part of the roof that overhangs the walls—are particularly vulnerable to ember attacks. Open eaves can trap hot air and embers, creating a perfect spot for a fire to start and spread to your attic and roof. The best way to protect them is to box them in with fire-resistant materials like fiber-cement or treated wood. If you have soffit vents under your eaves, make sure they are covered with 1/8-inch metal mesh to block embers. It’s also smart to remove any flammable items, like plants or wicker furniture, from directly below your eaves to eliminate fuel sources.
How to Harden Your Garage Against Wildfires
Your garage is often a weak link in your home’s defense. Garage doors are typically not as well-sealed as other entryways, and vents can allow embers to blow inside, where they can ignite stored fuel, cars, or other flammable materials. To secure this space, install fine metal mesh screens (1/16-inch to 1/8-inch) over all vents. You can also add metal flashing and fire-rated weather-stripping around the garage door to create a tighter seal. These small upgrades can prevent your garage from becoming a major fire hazard.
Keep a Fire Extinguisher Handy
Your garage is often a storage hub for flammable items like gasoline, propane tanks, and paint thinners. While sealing vents and doors is your first line of defense, you need a plan for what to do if a stray ember manages to get inside and find fuel. Keeping a multi-purpose (ABC) fire extinguisher mounted in a visible, easy-to-reach spot is a simple but crucial safety measure. Make sure it’s not buried behind boxes or tools. Knowing how to use an extinguisher is just as important, so familiarize yourself with the P.A.S.S. method (Pull, Aim, Squeeze, Sweep). This small preparation can give you the ability to stop a tiny ignition from becoming a catastrophe.
Install a Battery Backup for Your Garage Door
Wildfires and power outages frequently happen at the same time. If the power goes out, your automatic garage door opener won’t work, which can create a dangerous bottleneck during an evacuation. You might be forced to leave your car behind or, worse, leave the garage door open, creating a massive entry point for embers. Installing a battery backup on your garage door opener is a critical upgrade that ensures you can get your vehicle out and securely close the door behind you. This device provides peace of mind, knowing you can make a quick, safe exit while sealing off one of your home’s most vulnerable areas. Some states now require them for new installations for this very reason.
A Simple Checklist for Regular Inspections
Home hardening isn’t a one-and-done project; it requires consistent upkeep. Create a simple maintenance routine to keep your defenses strong. At least twice a year, especially before fire season, you should regularly clean leaves, pine needles, and other flammable debris from your roof and gutters. Walk around your home and inspect your doors and windows. Check for gaps, rotting frames, or torn screens that could let embers in. A little bit of proactive maintenance goes a long way in keeping your home safe and resilient year after year.
How to Budget for Your Home Hardening Project
Making your home more resilient to wildfire doesn’t have to be an overwhelming or impossibly expensive project. The key is to invest your time and money where it will have the greatest effect. You can start with simple, low-cost weekend projects and then plan for larger upgrades over time. By taking a strategic approach, you can systematically reduce your home’s vulnerability and build a property that is safer for your family and more attractive to insurance providers. This is about making smart choices that create layers of protection, starting from the outside in.
Start with These Low-Cost, High-Impact Fixes
You can make a huge difference in your home’s survivability without spending a lot of money. Most homes are lost to wildfire not from a giant wall of flame, but from small, wind-blown embers that find something flammable to ignite. Your first line of defense is to address these weak spots. Start by cleaning leaves and pine needles from your roof and gutters. Install fine metal mesh screening over all vents to block embers from getting inside. Walk around your house and seal any small gaps in siding or around windows. These simple actions directly counter the primary way homes catch fire. Many people believe massive flames are the main threat, but research debunking common wildfire myths shows that embers are the real culprits.
Which Major Upgrades Should Come First?
Once you’ve handled the easy fixes, you can plan for bigger projects. Focus your budget on the most vulnerable parts of your home first. Since embers rain down on a house, the roof is the top priority. If you have an old wood-shake roof, replacing it with a Class A fire-rated material like asphalt shingles, metal, or tile is the single most important upgrade you can make. After the roof, turn your attention to windows, siding, and decks. Upgrading to dual-pane tempered glass windows and non-combustible siding can prevent fire from penetrating your home. The goal is to create a structure that can withstand an ember storm, a concept known as home hardening that dramatically increases a home's chance of survival.
Can Home Hardening Lower Your Insurance Costs?
The work you do to protect your home can also help protect your finances. Insurance companies are paying close attention to wildfire risk, and the steps you take to harden your home can make a real difference in your ability to get and keep affordable coverage. Document every upgrade you make, from installing gutter guards to replacing your roof. Take photos and keep receipts, then share this information with your insurance agent. Proving that you’ve reduced your property’s risk can lead to better premiums or prevent a non-renewal. It's also a good time to review your policy to ensure you're not underinsured, a common issue that many homeowners discover after a disaster.
When to Call a Professional
While you can tackle many fire-safety tasks yourself, some jobs are best left to the experts. Major projects like replacing a roof, installing new windows, or re-siding a house require professional skills to ensure they’re done correctly and meet local building codes. A qualified contractor will know the best fire-resistant materials and construction techniques for our area. When looking for help, seek out professionals with specific experience in wildfire-resilient building. Choosing the right materials is critical, and decades of research have gone into refining home-loss-prevention strategies that a professional can help you implement. Don’t hesitate to ask for references and examples of their work in high-risk areas.
Create Your Wildfire Home Hardening Plan
Turning your home into a fire-resistant property isn’t a one-and-done project. It’s an ongoing commitment to maintenance and preparedness. Creating a simple, repeatable action plan helps you stay on top of crucial tasks without feeling overwhelmed. By breaking down your efforts into seasonal, weekly, and emergency-ready steps, you can build powerful habits that keep your home and family safe.
Remember, the goal is to manage your immediate surroundings. Research consistently shows that the condition of your home and the first 100 feet around it is often more critical for its survival than the intensity of the wildfire itself. A well-maintained, hardened home has a much better chance of withstanding the threat of wind-blown embers, which are the primary cause of home ignition. This plan will help you focus on the small, consistent actions that create a strong defense, giving you peace of mind and a clear path forward.
Your Seasonal Home Hardening Checklist
Think of this as your twice-a-year deep clean for fire safety. At the start of spring and again in the fall, set aside a weekend to tackle these bigger tasks. Start by thoroughly cleaning your roof and gutters of all leaves, pine needles, and other debris. Inspect your roof for any damaged or missing shingles and make repairs. Check all your vents—attic, foundation, and dryer—to ensure the screens are intact and free of holes larger than 1/8 inch. Trim back any tree branches that hang over your roof or come within 10 feet of your chimney. These seasonal efforts are some of the most effective strategies for reducing your property’s overall risk.
Quick Weekly Tasks for Fire Safety
Consistency is your best defense against embers. Most homes are lost during a wildfire not from direct flames, but from small, wind-blown embers landing on something flammable. Your weekly routine should focus on eliminating these easy ignition points. Every week, sweep decks, patios, and roof valleys to clear them of fallen leaves and pine needles. Move flammable items like brooms, doormats, and patio furniture at least five feet away from the house walls when not in use. Taking a quick walk around your property to remove any new debris from your immediate 0-to-5-foot zone is a simple habit that can make all the difference. These small actions directly address the most common wildfire threats to your home.
How to Prepare for a Wildfire Evacuation
When a wildfire is approaching, having a plan allows you to act quickly and calmly. Your first priority should always be your family’s safety, so start by preparing a "go-kit" with essentials and establishing a clear evacuation plan. Know multiple ways out of your neighborhood and have a designated meeting spot. For your home, prepare a last-minute checklist. This should include closing all windows, doors, and pet doors to seal the house from embers. If you have time, move flammable outdoor furniture and grills far away from the structure or inside the garage. Connect garden hoses to spigots on all sides of your house so they are ready for use. Having these steps planned out will help you prepare for an emergency without panic.
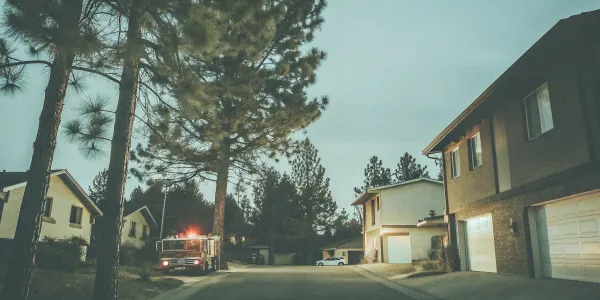
Ensure Emergency Responders Can Access Your Property
All your hard work hardening your home and creating defensible space could be for nothing if firefighters can't reach you when it matters most. During a wildfire, every second counts. First responders need to be able to find your home quickly and have enough room to maneuver their large vehicles and equipment. If your address is hidden or your driveway is too narrow, they might be forced to move on to a home they can safely defend. Making your property accessible is a critical, and often overlooked, part of your overall wildfire preparedness plan. It’s a simple way to give firefighters a safe space to work and your home a fighting chance.
Make Your Address Clearly Visible
In an emergency, firefighters need to find you fast, and they can't do that if your address is hidden. Make sure your house number is clearly visible from the street, even in smoky conditions or at night. Use large, reflective numbers (at least four inches high) that contrast with their background. Place them on your house and at the end of your driveway or on your mailbox. Regularly check that they aren’t obscured by overgrown plants, holiday decorations, or parked cars. According to CAL FIRE, ensuring your house number is easy to see is a fundamental step in emergency preparedness that helps workers find you quickly.
Clear Your Driveway and Gates
A fire engine is a massive vehicle that needs a lot of space to operate safely. Your driveway is their access route, so it needs to be wide and clear. You should maintain at least 10 feet of clearance on both sides of your driveway and any other access roads on your property. Trim back low-hanging tree branches to provide at least 15 feet of vertical clearance. If you have a gate, make sure it’s wide enough for emergency vehicles to pass through easily and that it opens inward, away from the road. A clear path ensures that firefighters can get to your home without delay and position their equipment to defend it effectively.
Plan for an Emergency Water Supply
While firefighters will bring their own water, having an accessible on-site supply can be a huge help. Make sure you have long garden hoses that can reach every part of your property, including your roof and deck. If you have a swimming pool, well, or water tank, consider getting a pump that can be used to access that water during an emergency. Clearly mark all your water sources so they are easy for first responders to find. This preparation doesn't mean you should stay and fight the fire yourself—your safety is always the priority—but it provides a valuable resource for the professionals working to protect your home.
Who Should You Hire for Home Hardening?
While you can tackle many home hardening tasks yourself, some projects—like replacing a roof or installing new windows—require a professional. Finding the right person for the job is about more than just getting a fair price; it’s about ensuring the work is done correctly to truly protect your home. The right contractor will understand the specific demands of building in a wildfire-prone area and use materials and techniques that stand up to embers and flames.
Think of this as building your home's safety team. Beyond contractors, your local community often has a wealth of resources, from fire departments to safety councils, that can offer expert guidance tailored to your specific area. Many regions also provide financial assistance to help offset the costs of these critical upgrades. Taking the time to find qualified professionals and tap into available support can make the entire process smoother and more effective.
Questions to Ask Before Hiring a Contractor
When you’re ready to hire help, it’s essential to find a contractor with direct experience in home hardening. A general contractor might be great at remodeling kitchens, but they may not know the best practices for installing ember-proof vents or the specific building codes for high-risk fire zones. When you start your search, ask for their experience with wildfire resilience projects specifically.
Before you sign a contract, always do your homework. Verify their professional license and insurance to ensure they are in good standing. Ask for references from recent home hardening jobs and follow up with those homeowners. Get at least three written bids to compare, but remember that the lowest bid isn’t always the best. A qualified professional can explain why they recommend certain materials and give you confidence that the job will be done right.
Find Local Fire Safety Programs and Resources
You don’t have to figure everything out on your own. Your local community is one of your best resources for guidance. Organizations like your local fire department or a regional Fire Safe Council are staffed with experts who understand the unique risks in your area. They often provide free resources, including home assessments and customized checklists that can help you prioritize your efforts.
These groups can also offer workshops and educational materials, like a wildfire home retrofit guide, that walk you through the most effective hardening strategies. Connecting with these local experts gives you access to reliable, area-specific advice that you can’t always find online. They can help you understand local building codes and point you toward proven solutions for your property.
Understand Local Building Codes and Ordinances
Before you start any major project, it’s crucial to understand the rules in your specific area. These local building codes and ordinances are essentially a safety playbook, often specifying the exact types of fire-resistant materials you need for roofing, siding, and windows. They exist to make sure that any new construction or renovation meets a minimum standard of fire resistance, which is especially important in high-risk zones. These regulations can vary significantly from one county or even city to another, so what’s required for your neighbor one town over might not apply to you. Your county or city’s building department is the best place to start. Their website usually has this information, or you can give them a call. A qualified contractor will be familiar with these requirements, but it’s always smart to be informed yourself.
Can You Get Financial Help for Home Hardening?
The cost of major home hardening projects can feel daunting, but financial help is often available. Many federal, state, and local agencies offer grants, rebates, or low-interest loans to help homeowners make their properties more wildfire-resilient. These programs are designed to encourage proactive measures that protect both individual homes and the entire community. Effective policies for reducing wildfire risk often include mandated building codes and home hardening measures, which are frequently supported by these financial assistance programs.
Start your search by checking with your state’s office of emergency services or department of forestry and fire protection. Local Fire Safe Councils and even some utility companies also manage assistance programs. These funds can make significant upgrades, like replacing a roof or installing dual-pane windows, much more attainable.
Your Long-Term Home Hardening Maintenance Plan
Home hardening isn't a one-and-done project. Think of it as essential home maintenance, like cleaning your gutters. A hardened home stays that way through consistent upkeep, because materials wear down, new gaps appear, and vegetation creeps back into your defensible space. Staying on top of these small changes ensures your home is always prepared, turning your initial investment into a long-term shield for your family and property.
Develop a Simple Inspection Routine
Your best defense is a good routine. You don't need to spend every weekend on high alert; just build a few key tasks into your seasonal calendar. As CAL FIRE notes, "Regularly cleaning debris and sealing small gaps are simple but very important steps." Walk your property once a month to look for accumulated pine needles on the roof, dead leaves under the deck, or new cracks in your siding. Check that vent screens are intact and that there's no flammable clutter piled against the house. A simple checklist on your phone or calendar can help you stay consistent and turn these crucial inspections into a quick, manageable habit.
Why You Should Keep Records of Your Upgrades
Keeping a detailed file of your home hardening efforts is one of the smartest things you can do. This isn't just for your own reference; it's valuable documentation for your insurance provider and can even increase your home's resale value. Your records should include receipts for fire-resistant materials, photos of the completed work, and contractor invoices. These upgrades are backed by decades of research from organizations like the U.S. Forest Service and the Insurance Institute for Business and Home Safety. Having proof of these science-backed improvements shows you’ve made a serious investment in reducing your property’s risk, which can be a game-changer when discussing your policy.
Planning for Long-Term Fire Safety
Maintaining your hardened home is about adopting a mindset of proactive resilience. Wildfire risk isn't static, and your preparedness shouldn't be either. In fact, research shows that hardening your home and its immediate surroundings is often more critical for structure survival than controlling the fire itself. This means your long-term plan should include budgeting for future upgrades, like replacing old windows or upgrading your siding. Stay informed about new fire-resistant technologies and any changes to local building codes. By treating home hardening as an ongoing commitment, you ensure your property remains a safe haven for years to come.
Related Articles
- How Is a Wildfire Risk Score Calculated? A Guide
- A Guide to Homeowners Insurance in CA High Risk Fire Areas
- Your Guide to the FireSmart Home Ignition Zone
- Defensible Space Zones: A Homeowner's Guide
Frequently Asked Questions
This all feels like a lot. Where is the best place to start? Start with the five feet closest to your home’s foundation. This immediate zone is the most critical area for preventing ignition. Focus on simple, high-impact tasks you can do in a weekend, like cleaning all leaves and pine needles from your roof and gutters, moving firewood piles at least 30 feet away from the house, and clearing any dead vegetation from under your deck. These actions directly counter the main threat of embers and give you the most safety for your effort.
What's more important: clearing my yard or upgrading my house materials? They are two parts of the same defense system. Think of defensible space as your property’s perimeter defense, designed to slow a fire down and reduce its intensity before it reaches your home. Fire-resistant materials are your home’s armor, its last line of defense against the embers that will land on it. If you have to prioritize, start with creating a clean, non-combustible zone right against your foundation, as this prevents embers from finding easy fuel right next to your walls.
Will making these changes actually help me keep my homeowner's insurance? Yes, it can make a significant difference. Insurance companies are looking for homeowners who are actively reducing their property's risk. When you harden your home and create defensible space, you demonstrate that you are a responsible partner in protecting your property. Be sure to document all your work with photos and receipts and share this file with your insurance agent. It can be a powerful tool in preventing a policy non-renewal or securing better terms.
My neighbor isn’t doing any of this work. Will my efforts still make a difference? Absolutely. While community-wide participation is the ideal, the work you do on your own property dramatically increases your home's individual chances of survival. The primary goal of home hardening is to prevent embers from igniting your house and its immediate surroundings. By managing your own defensible space and securing your home's weak spots, you create a resilient property that can better withstand an ember storm, regardless of what's happening next door.
Is it true that a wall of flames is the biggest threat to my home? It’s a common image, but it’s not how most homes are actually lost in a wildfire. The real and more frequent threat comes from the storm of tiny, wind-blown embers that the fire throws far ahead of itself. These embers can travel a mile or more and land on your roof, in your gutters, or under your deck. If they find something flammable, they can easily start a new fire. Your entire defense strategy should be built around preparing your home to survive this ember attack.