The Complete Wildfire Home Insurance Inspection Checklist
Get a practical home insurance inspection checklist wildfire guide. Learn how to prepare your property, meet requirements, and protect your coverage.
Many homeowners think that clearing a few feet of brush is enough to pass a wildfire inspection, only to be surprised by a non-renewal notice. The truth is, inspectors look at a much wider range of details, from the type of mulch near your foundation to the mesh size on your attic vents. To avoid common and costly mistakes, you need a clear strategy that covers every angle. This guide is your roadmap to getting it right. Our home insurance inspection checklist wildfire breaks down the specific details that can make or break your assessment, ensuring you’re prepared for every question.
Key Takeaways
- Prioritize your home's immediate surroundings and its construction: Your home's survival depends on creating a non-flammable buffer in the first five feet from your foundation and hardening the structure itself with Class A roofing, mesh-covered vents, and fire-resistant siding.
- Treat the inspection as a final check, not a first draft: Get ahead of the process by performing your own walkthrough using an online assessment tool. This allows you to identify and fix potential issues on your own terms before the official inspector ever arrives.
- Build a portfolio of your safety efforts to prove your home is a low risk: Your hard work only counts if your insurer knows about it. Keep a detailed record with before-and-after photos, receipts for materials, and a log of annual maintenance to demonstrate your ongoing commitment to safety.
What Is a Wildfire Insurance Inspection?
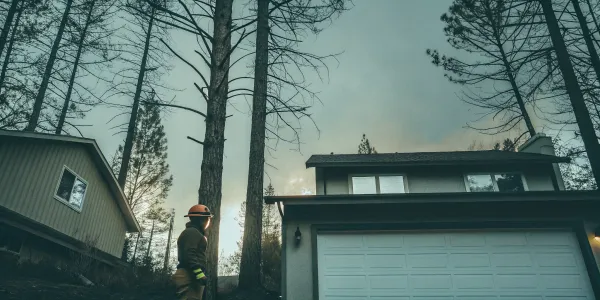
A wildfire insurance inspection is a professional evaluation of your property to determine its risk of damage from a wildfire. Think of it as a check-up for your home's fire safety. An inspector, often sent by your insurance company, will look at your house and the surrounding land to see how well-prepared you are for a potential fire. They assess everything from your roofing material and vents to the trees and shrubs near your foundation.
The main goal is for the insurer to understand the level of risk they’re taking on by covering your home. In areas with high wildfire danger, these inspections are becoming a standard part of the process for getting a new policy or renewing an existing one. The inspector’s report gives the insurance company a clear picture of your property’s vulnerabilities and strengths. For you, the homeowner, it provides a concrete list of actions you can take to make your home safer and more insurable. It’s a critical step in protecting your investment and ensuring you have the coverage you need when it matters most.
Why Your Insurer Requires a Wildfire Inspection
Insurance companies require wildfire inspections to manage their financial risk. When they insure a home in a fire-prone area, they need to be confident that the property isn't an excessive liability. The inspection serves as their eyes on the ground, confirming that you’ve taken proactive steps to reduce potential fire damage. A home with a well-maintained defensible space and fire-resistant features is a much safer bet for them. This process helps them decide whether to offer you a policy, what your premium will be, and if you qualify for continued coverage. Being part of a recognized Firewise USA® site can also demonstrate your community's commitment to safety, which insurers often view favorably.
How Inspections Safeguard Your Home and Your Policy
While an inspection might feel like just another requirement, it’s actually a powerful tool for your own protection. The final report gives you a clear, expert-driven roadmap for improving your home's defenses against wildfire. By following its recommendations, you are taking direct action to protect your property and your family. This proactive approach is exactly what insurers want to see. Demonstrating that you’ve met the standards for wildfire preparedness can help you secure a better insurance rate and prevent your policy from being canceled. Ultimately, the inspection process helps align your safety efforts with your insurer’s requirements, safeguarding both your home and your coverage.
Inspect Your Home's Structure and Roofing
After you’ve cleared your defensible space, the next step is to look at the house itself. Think of your home’s structure as its last line of defense against wildfire. Wind-blown embers can travel a mile or more ahead of a fire, and if they land on or find a way inside your home, the entire structure is at risk. An insurance inspector will pay close attention to these "home hardening" features, as they are critical for reducing the chances of ignition. Making sure your roof, vents, and siding are made from the right materials and are well-maintained can be the deciding factor in whether your home survives a wildfire.
Check for Fire-Resistant Roofing (Class A)
Your roof is the most vulnerable surface of your home, acting as a wide-open catcher’s mitt for falling embers. That’s why having a roof with a Class A fire rating is non-negotiable in wildfire-prone areas. This is the highest rating available, indicating that the material can withstand severe fire exposure. Materials that typically meet this standard include asphalt shingles, metal, and concrete or masonry tiles. If you have a tile roof, it’s also important to install “bird stops” or other plugs at the edges to close any gaps where embers could get underneath. An inspector will look for this rating and the overall condition of your roof.
Secure Gutters, Vents, and Ember Shields
It’s the small openings that often pose the biggest threat. Gutters filled with dry leaves and pine needles are basically troughs of kindling waiting for a spark. Keep them clean year-round. Beyond gutters, you need to check every vent. Attic, foundation, and crawl space vents can act like vacuums, sucking embers directly into your home. To prevent this, make sure all vents are covered with a fine metal mesh (1/8-inch or smaller). Upgrading to specially designed ember-resistant vents is an even better solution that inspectors will be happy to see.
Assess Exterior Walls, Siding, and Your Foundation
A fire can creep along the ground and ignite your home where the walls meet the foundation. To stop this, the bottom six inches of your exterior walls should be made of non-combustible materials. An inspector will check this area specifically. Good options include concrete, brick, stone, or fiber-cement siding. This simple buffer prevents flames from climbing your walls and reaching more vulnerable materials like wood siding or your eaves. It’s a small detail that provides a significant amount of protection and shows an insurer you’ve taken proactive steps to harden your home from the ground up.
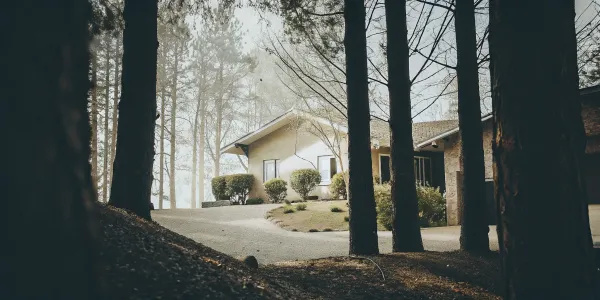
Create Your Defensible Space
Creating defensible space is one of the most effective ways to protect your home from wildfire. Think of it as a buffer zone you create between your house and the surrounding landscape. This space is designed to slow or stop the spread of wildfire and protect your home from catching fire—either from direct flame contact or radiant heat. It’s also a critical safety zone for firefighters to work in.
Inspectors will look closely at how you’ve managed the vegetation and materials in three distinct zones around your property. These zones are based on guidelines from programs like the Wildfire Prepared Home assessment, which provides a clear framework for reducing your risk. Let’s walk through what you need to do in each area.
Zone 1: The First 5 Feet From Your Home
This is your home’s most vulnerable area, often called the immediate or non-combustible zone. Your goal here is to create a perimeter that is completely free of anything that can burn. Think of it as a non-flammable welcome mat for your house. In this critical space, you should use ground cover like gravel, pavers, or bare dirt. Make sure this zone is clear of all debris, including fallen leaves and pine needles. No plants of any kind—trees, shrubs, grass, or even weeds—should be within five feet of your home’s foundation. Also, remove any flammable items like firewood stacks, patio furniture, trash cans, or door mats from this area.
Zone 2: The Intermediate Zone (5-30 feet)
In the zone extending from 5 to 30 feet from your home, the focus shifts from eliminating fuel to reducing it. You want to create breaks in vegetation to disrupt a fire’s path and keep flames small and on the ground. Start by trimming large trees so the lowest branches are at least six feet from the ground. Ensure there’s a minimum of 10 feet between the canopies of mature trees. For shrubs and bushes, space them apart by at least twice the height of the tallest plant. Avoid planting them in dense rows that could act like a wick for fire. Regularly cleaning up dead plants, leaves, and other yard waste in this zone is also essential for keeping your property safe.
Zone 3: The Extended Zone (30-100+ feet)
This outer ring of your defensible space, reaching from 30 to at least 100 feet out, is your first line of defense. The objective here is to interrupt a fire's path and reduce its intensity before it gets close to your home. You don’t need to clear-cut the area, but you should thin out the vegetation. Remove any dead trees and shrubs, and keep the space clear of heavy accumulations of fallen leaves, pine needles, and other debris. Trees and shrubs should be well-spaced to prevent a fire from easily jumping from one to another. Proper management in this zone slows a wildfire down, giving firefighters a much better chance to protect your home.
Meet Common Insurance Requirements for Wildfire Safety
Insurance providers have a clear picture of what makes a home resilient to wildfire. Think of it less as a mysterious set of rules and more as a practical safety checklist. When an inspector visits, they’re looking for specific features that show you’ve taken steps to reduce your property’s risk. Meeting these common requirements is your best strategy for securing and keeping your homeowners insurance. It’s all about demonstrating that your home is a lower risk to insure. Let's walk through the key areas they'll focus on, from your roof down to your landscaping.
Follow Minimum Construction Standards
Your home's construction is its primary shield against embers. Insurers will look closely at your roof, so having Class A fire-rated materials like asphalt shingles, metal, or concrete tiles is a must. They’ll also check your vents. To prevent embers from getting inside, all exterior vents need a fine metal mesh screen (1/8-inch or smaller). Don't forget your dryer vent—it should be metal with a working flap. Another key area is the base of your house. The bottom six inches of your exterior walls should be made of non-combustible materials like concrete, brick, or fiber-cement siding. These standards are part of the Wildfire Prepared Home assessment and make a huge difference in an inspection.
Adhere to Landscaping and Vegetation Rules
Your yard is a critical part of your home's defense system. Insurers want to see a clean, non-flammable area immediately surrounding your home. Think of the first five feet from your foundation as a "no-plant" zone. This space should be clear of all vegetation—no shrubs, grass, or overhanging tree branches. Instead, use materials like gravel, pavers, or bare earth. For larger trees on your property, trim branches so they are at least six feet off the ground, and maintain about 10 feet of space between canopies to stop fire from jumping from tree to tree. Consistent upkeep, like clearing away fallen leaves and pine needles, shows an inspector you’re serious about maintaining your defensible space.
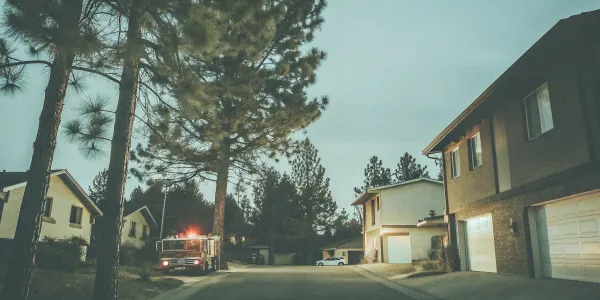
Ensure Clear Access Roads and Water Sources
When it comes to an emergency, every second counts. An inspector will verify that your property is accessible and that potential fire hazards are managed. This means keeping all exit routes from your property clear and unobstructed. They'll also look at the areas under and around your decks and porches, which should have a five-foot clear zone filled with non-flammable materials. Outbuildings can also pose a risk. If you have structures like sheds or gazebos within 30 feet of your home, insurance guidelines often limit you to a maximum of three. These rules help ensure that there are fewer things near your home that could ignite and that emergency responders can get to your property if needed.
Document Your Wildfire Safety Efforts
After putting in the time, money, and effort to make your home safer from wildfires, you need to make sure your insurance company knows about it. Simply doing the work isn't always enough; you have to prove it. Creating a clear, organized record of your mitigation efforts shows your insurer that you are a proactive and responsible homeowner. This documentation can be the key to not only keeping your policy but also demonstrating that your property is a lower risk. Think of it as building a case for your home’s insurability. A detailed file with photos, receipts, and reports tells a powerful story of your commitment to safety, making it much harder for an insurer to deny or drop your coverage based on wildfire risk. It transforms your hard work from a weekend project into a tangible asset for your insurance negotiations.
Take Photos and Keep Detailed Records
Your phone is one of the most powerful tools you have for documenting your work. Before you start any mitigation project—whether it’s clearing brush, installing new vents, or replacing a fence—take “before” photos. Once the work is complete, take the same shots again to create a clear visual comparison. Keep a dedicated digital folder or a physical binder for all your wildfire safety efforts. Inside, file every receipt for fire-resistant materials, every invoice from contractors who performed vegetation management, and your dated photos. Make notes on what work was done and when. This portfolio shows your insurance company a history of ongoing maintenance and proves you’re serious about reducing your home’s risk.
Get Professional Inspection Reports
Instead of waiting for your insurance company to send an inspector, consider hiring your own. A report from a qualified wildfire mitigation specialist gives you an independent, expert assessment of your property. This can help you identify any remaining vulnerabilities and provides credible, third-party validation of the improvements you’ve made. Before hiring someone, it’s a smart move to ask your insurance agent if they have a list of approved or recommended inspectors. Sharing a favorable report from a trusted professional with your insurer can significantly strengthen your position and demonstrate that your home meets or exceeds safety standards. It’s a proactive step that shows you’re not just meeting requirements, but aiming to be a model of wildfire preparedness.
Log Your Annual Maintenance
Defensible space isn't a one-and-done project; it requires consistent upkeep. Logging your annual maintenance is a simple yet effective way to show your insurer that you’re committed to safety year after year. Create a simple checklist or spreadsheet to track routine tasks. Note the dates you clean leaves from your roof and gutters, mow dry grasses, trim back tree limbs, and inspect your vents for ember intrusion. This log serves as an ongoing record of your diligence. You can even use a free online home assessment as a guide for your annual walkthrough, ensuring you don’t miss any critical details before a formal inspection. This simple habit proves that your property doesn't just look safe on inspection day—it’s maintained that way all year long.
Choose Fire-Resistant Building Materials
The materials your home is built with are your first line of defense against wildfire. While creating defensible space is crucial, hardening your home’s structure by choosing fire-resistant materials can dramatically reduce the chances of ignition from flying embers. Think of it as giving your home a suit of armor. An inspector will look closely at these features because they know that a stray ember finding its way into a vulnerable vent or onto a flammable roof is often how homes are lost.
Making smart upgrades to your home’s exterior isn’t just about passing an inspection; it’s about giving yourself peace of mind. From the shingles on your roof to the mulch in your garden bed, every choice matters. Focusing on non-combustible or fire-rated options for your roof, siding, windows, and even your fencing creates a powerful barrier that helps protect your biggest investment. Let’s walk through the key areas where material choice makes the biggest impact.
Upgrade Your Roofing, Siding, and Fencing
Your roof is the most vulnerable surface of your home during a wildfire, so it’s the best place to start. An inspector will want to see a roof with a Class A fire rating, which is the highest standard for fire resistance. Materials like asphalt shingles, metal, slate, or concrete and clay tiles all typically meet this standard. If you have tile roofing, make sure it has "bird stops" to plug any gaps where embers could get underneath. For siding, fiber cement, stucco, and treated wood are excellent fire-resistant choices. Finally, pay close attention to any fencing that connects to your house. If a fence is within five feet of your home, it must be built from non-combustible materials like metal to prevent it from acting like a wick, carrying fire directly to your walls.
Install Fire-Rated Windows, Doors, and Vents
Embers are tiny, but they are a wildfire’s most dangerous weapon. They can travel over a mile ahead of a fire and find their way into the smallest openings in your home. That’s why sealing up potential entry points is so important. All exterior vents—for your attic, foundation, or crawl space—should be covered with a fine metal mesh (1/8-inch or smaller) to block embers. Even your dryer vent needs a cover. For windows, dual-paned tempered glass is the standard for wildfire-prone areas, as a single pane can easily shatter from the heat, allowing flames and embers inside. Solid-core exterior doors also provide better protection than hollow ones. These home hardening upgrades are some of the most effective ways to keep your home safe.
Select Fire-Smart Landscaping Materials
What you plant and place around your home is just as important as the structure itself. In the first five feet around your foundation (Zone 1), avoid using flammable materials like wood mulch. Instead, opt for non-combustible ground cover like gravel, pavers, or bare earth. This simple switch creates a fire-free buffer right where it matters most. When choosing plants, select high-moisture, low-resin varieties that are less likely to burn. Regular maintenance is also key. Keep your yard clear of dead leaves, pine needles, and dry grass. For larger trees, trim branches so they are at least six feet off the ground and ensure there’s a minimum of 10 feet of space between canopies to stop fire from spreading from tree to tree.
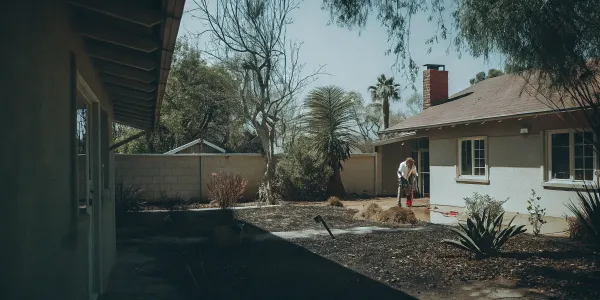
Prepare Your Property for an Inspection
An upcoming insurance inspection can feel like a final exam you didn’t have time to study for. But it doesn’t have to be that way. Instead of waiting for an inspector to hand you a list of problems, you can take control of the process. Preparing your property ahead of time shows your insurance provider that you are a proactive, low-risk partner in protecting your home. It’s your best opportunity to demonstrate that your property is a safe, insurable investment.
A successful inspection isn’t about making massive, expensive changes overnight. It’s about being strategic. By walking through your property with a critical eye, making smart and targeted upgrades, and documenting your efforts, you can address potential issues before they become official problems. This approach not only makes the formal inspection process smoother but also strengthens your home’s defenses against wildfire. It puts you in the driver's seat, turning a potentially stressful event into a productive one that can lower your risk profile and even help you maintain your coverage. Let’s walk through the three key steps to get your property ready for inspection day.
Complete a Pre-Inspection Walkthrough
Before an inspector ever sets foot on your property, you should do your own walkthrough. This gives you the chance to see your home through their eyes and catch any red flags ahead of time. Think of it as a dress rehearsal—it helps you find and fix the small things before they become big issues on your official report. You can start with a simple visual check of your roof, gutters, vents, and the immediate space around your home’s foundation.
For a more structured approach, you can use a free online tool to guide you. The Wildfire Prepared Home program offers a home assessment that helps you check if your property meets key safety requirements before you schedule an official inspection. This step helps you create a clear to-do list and tackle problems on your own timeline.
Make Smart, Cost-Effective Safety Upgrades
You don’t need a complete overhaul to make a meaningful impact. Focus on high-value upgrades that inspectors look for first. Start with your defensible space, clearing away dead vegetation, flammable mulch, and any combustible items within the first five feet of your home. Ensure the bottom six inches of your home's exterior walls are made of non-combustible materials like concrete, brick, or fiber cement siding, as this is a critical defense against ground-level embers.
From there, you can move on to sealing vents with fine mesh to block embers and confirming your siding and roofing are made from fire-resistant building materials. These targeted improvements are some of the most effective ways to reduce your home’s vulnerability and show an inspector you’re serious about safety.
Avoid Common Mistakes That Risk Your Coverage
One of the biggest mistakes homeowners make is failing to document their hard work. Passing an inspection isn’t just about what the inspector sees on a given day; it’s about proving your ongoing commitment to wildfire safety. Insurance companies need to see that your home is a low risk, and your records are the proof. Keep a simple log of your annual maintenance, from clearing your gutters to trimming back trees.
Take before-and-after photos of every project you complete. Keep receipts for fire-resistant materials or professional services. This portfolio shows an insurer that you are actively managing your property’s risk year-round. It turns your safety efforts from a one-time fix into a long-term habit, which is exactly what insurers want to see.
What to Expect During a Professional Inspection
Knowing what happens during a professional wildfire inspection can take a lot of the stress out of the process. Think of it as a health check-up for your home’s wildfire safety. An inspector is there to identify potential vulnerabilities and give you a clear, actionable path to making your property more resilient. They follow a standardized process to evaluate your home’s structure, materials, and the defensible space around it. This assessment gives you a detailed report card you can use to make targeted improvements and show your insurance provider that you’re serious about risk reduction.
The Inspector's Process and Timeline
To get the most out of an inspection, consider hiring your own inspector for a comprehensive written report. Before you book someone, it’s a smart move to check with your insurance company. They may have a list of approved professionals who meet their standards, which can help the entire process go more smoothly. Once the inspector is on-site, they will systematically walk your property, examining your home’s exterior and the surrounding landscape. The timeline can vary, but most inspections are completed within a few hours, and you should receive a detailed report shortly after.
Key Areas the Inspector Will Check
An inspector’s main goal is to see how well your home can resist embers and flames. They’ll look at specific features to determine if your property meets safety standards, like those for a Wildfire Prepared Home designation. Key areas of focus include:
- Fire-Resistant Materials: They will verify that your roof is made of Class A-rated materials like asphalt shingles, concrete tile, or metal.
- Exterior Vents: Vents in your attic and crawl spaces must be covered with a fine metal mesh (1/8-inch or smaller) to block flying embers.
- Foundation and Siding: The bottom six inches of your home’s exterior walls need to be made of non-combustible materials like concrete, brick, or fiber cement siding.
How to Read Your Inspection Report
Your inspection report is your roadmap. It will outline your home’s strengths and pinpoint areas that need attention. As you make improvements based on the report, keep detailed records of everything you do. Take before-and-after photos and save all receipts and invoices. This documentation is powerful proof for your insurance company that you are actively maintaining a fire-safe property. If the report recommends significant repairs, it’s always a good idea to consult a fire protection professional to ensure the work is done correctly and meets all safety codes.
Handle a Post-Wildfire Insurance Claim
Dealing with the aftermath of a wildfire is overwhelming. When you’re ready to start the recovery process, a smooth insurance claim can make all the difference. Knowing what to do—and when—helps ensure you get the support you need to rebuild. Think of this as your roadmap for handling the claim, from the first phone call to the final repair. It’s about taking control of the process one step at a time.
Take These Steps Immediately After a Fire
Your first call should be to your insurance company or agent to report the damage. If you have trouble reaching them, your state’s insurance division can often help. When you call, provide your current contact information, as you may be staying somewhere else temporarily. Be sure to get your claim number and write down the names of the people assigned to your case. It’s also smart to ask for a complete copy of your insurance policy; your insurer is typically required to provide it within a few business days. This document is your guide to understanding what’s covered, so having it on hand is essential as you begin the claims process.
Document Everything to Support Your Claim
Before you clean up or move anything, document the damage thoroughly. Use your phone to take extensive photos and videos of your property, capturing everything from wide shots of the structure to close-ups of specific damage. Next, create a detailed list of every item that was damaged or destroyed. For temporary fixes meant to prevent further issues, like putting a tarp over a hole in the roof, save every single receipt. The most important rule is to avoid making permanent repairs or throwing away any damaged belongings until your insurance adjuster has inspected the property and given you explicit permission to do so. This evidence is crucial for validating your claim and getting a fair settlement.
Work Effectively with Adjusters and Contractors
When it’s time to rebuild, hire licensed and insured contractors. It’s even better if you can find professionals who have experience with fire damage and insurance claims. Always ask for and check their references. Once you receive a damage estimate from your insurance company, share it with your contractor to make sure everyone is on the same page. Before any work begins, confirm that your insurance company approves the proposed repairs. As the project moves forward, stay involved and check in on the progress regularly. Taking these steps helps protect you from fraud and ensures the repair work meets your standards and the terms of your insurance policy.
Related Articles
- A Guide to Homeowners Insurance in CA High Risk Fire Areas
- 5 Steps to Wildfire Mitigation for Insurance Approval
- Best Insurance Companies for High Brush Areas
- Getting Homeowners Insurance in High Fire Risk Areas
Frequently Asked Questions
What's the first thing I should focus on if an inspection is coming up soon? Start with the area immediately surrounding your home. The first five feet from your foundation is the most critical zone an inspector will check. Clearing this space of all flammable materials—plants, wood mulch, firewood, and even patio furniture—is a high-impact, low-cost action you can take right away. This simple step shows an inspector you understand the fundamentals of wildfire safety and can make a huge difference in your final report.
Do I have to spend a fortune on upgrades to pass an inspection? Not at all. While big projects like replacing a roof are effective, many of the most important safety measures are about maintenance, not massive spending. Things like consistently cleaning your gutters, trimming low-hanging tree branches, and keeping the area around your foundation clear are often more about your time and effort than your money. Focus on these foundational tasks first, as they provide significant protection and show an insurer you are actively managing your risk.
Is creating defensible space a one-time project? Think of defensible space as part of your regular home and yard maintenance, not a one-and-done task. Nature is always growing, and leaves and pine needles will always fall. Plan to walk your property at least once a year, especially before fire season, to tidy up. This means clearing debris from your roof and gutters, trimming back any new growth that’s too close to the house, and ensuring your vegetation remains properly spaced.
What if my property has unique challenges, like a steep slope or dense natural forest? The core principles of defensible space still apply, but you may need to adjust your approach. On a steep slope, fire can move more quickly, so you might need to extend your clearance zones. If your property borders a dense forest, your focus will be on thinning the vegetation closest to your home to create a clear buffer. In these complex situations, it can be helpful to consult a professional wildfire mitigation specialist who can provide advice tailored to your specific landscape.
Besides passing the inspection, what's the real benefit of documenting all my work? Keeping a detailed record of your safety efforts builds a long-term case for your home's insurability. This documentation—photos, receipts, and maintenance logs—tells a powerful story to your insurance provider that you are a responsible homeowner. It can be invaluable if you ever need to switch insurance companies or if your policy comes up for non-renewal. It proves your property is a lower risk and gives you tangible evidence to support your position.