How to Use a Defensible Space Tool: A Practical Guide
Learn how to use a defensible space tool to assess wildfire risks, create a safer property, and document your progress for insurance with clear, simple steps.

For years, creating defensible space meant walking your property and making your best guess about what to clear. But wildfires have changed, and so have the tools we use to prepare for them. A digital assessment gives you a powerful, bird's-eye view, using data and aerial imagery to spot vulnerabilities you might miss from the ground. It takes the emotion and guesswork out of the equation, replacing it with a clear, objective score and a step-by-step plan. This guide will show you how to use a defensible space tool to see your home like a fire marshal does, ensuring the time and effort you invest have the biggest possible impact on your family’s safety.
Key Takeaways
- Prioritize Your Work in Zones: Systematically reduce your wildfire risk by focusing on the three defensible space zones. Start by clearing all flammable materials in the critical 0-5 foot area around your home, then work outward to clean and thin vegetation to rob an approaching fire of its fuel.
- Turn Your Hard Work into Proof: A digital assessment report is your most powerful tool for insurance conversations. It translates your clearing efforts into objective data—including a risk score and photos—that demonstrates your commitment to safety and strengthens your case for coverage.
- Adopt a Maintenance Routine: Defensible space is a living part of your property that requires ongoing attention. Create a simple seasonal checklist and conduct an annual walk-through to manage new growth and debris, ensuring your home remains protected year after year.
What is a Defensible Space Tool?
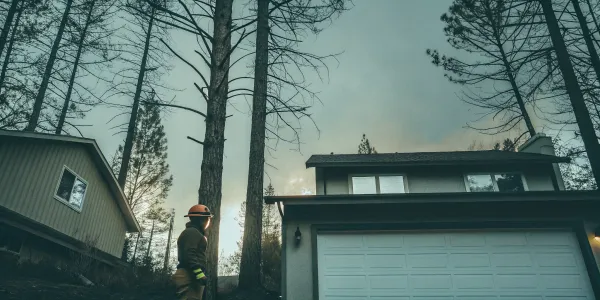
Think of defensible space as a buffer zone you create between your home and the surrounding landscape. It’s your property’s first line of defense against a wildfire, designed to slow a fire’s spread and give firefighters a safer space to work. A defensible space tool is a modern approach to managing this critical area. Instead of just eyeballing it, these tools use data and aerial imagery to give you a clear, objective look at your property’s vulnerabilities.
A good tool helps you see your home the way a wildfire or a fire marshal might. It analyzes the vegetation, structures, and potential fuel sources around your house and translates that information into a straightforward assessment. The goal isn’t just to point out problems, but to provide a clear, actionable roadmap for making your property safer. It takes the guesswork out of wildfire preparedness, helping you focus your time and effort where it will make the biggest difference.
The Three Defensible Space Zones, Explained
To create effective defensible space, experts divide the 100 feet around your home into three distinct zones. Each has a specific job to do in protecting your property. Understanding these zones is the first step to a solid plan.
- Zone 0 (0-5 feet): The Ember-Resistant Zone. This is the most critical area, right against your house. The goal here is to have nothing combustible. Think gravel walkways, concrete patios, or rock gardens instead of bark mulch or flammable plants.
- Zone 1 (5-30 feet): The Lean, Clean, and Green Zone. Here, you want to break up the path a fire could take. This means removing dead vegetation, keeping grass mowed, and creating plenty of space between trees and shrubs.
- Zone 2 (30-100 feet): The Reduce Fuel Zone. In this outer ring, the focus is on thinning vegetation. You’ll want to remove smaller trees growing under larger ones and ensure there are gaps between tree canopies to keep a fire on the ground. You can find more details on how to prepare for wildfire from official sources like CAL FIRE.
Why Use a Digital Assessment Tool?
Walking your property is important, but a digital assessment tool gives you a powerful new perspective. These tools use high-resolution imagery and data analysis to spot risks you might miss from the ground. They can measure the distance between trees, identify overgrown areas, and calculate your property’s overall risk with an objective score. This data-driven approach removes the emotion and guesswork from the process.
Instead of a vague to-do list, a digital tool provides a prioritized action plan. It can show you exactly which tree needs trimming or where you need to clear brush to make the most impact. This helps you use your resources wisely and gives you a clear path forward. It also creates a digital record of your property, which can be incredibly useful for tracking your progress and sharing with insurance providers.
What to Look For in a Defensible Space Tool
Not all defensible space tools are created equal. When you’re choosing one, look for a platform that offers clear, actionable guidance. A simple risk score is helpful, but the best tools go further. You want a tool that provides a personalized action plan with specific tasks tailored to your property’s unique layout and vegetation. Interactive maps that let you see your property from above and visualize the different zones are also incredibly valuable.
The tool should also help you document your work. Look for features that allow you to upload photos and track your improvements over time. This creates a verifiable record of your efforts. Finally, a great tool makes it easy to generate a report you can share with your local fire department or insurance company, proving that you’ve taken proactive steps to make your home safer.
How to Start Your Assessment
Getting started with your defensible space assessment can feel like a big project, but it’s really just a series of small, manageable steps. Before you start clearing brush or trimming trees, a little prep work will make the entire process smoother and far more effective. Think of it as creating a game plan. By mapping your property, understanding the specific rules for your area, and gathering some basic information, you’re setting yourself up for success. This initial phase is all about seeing your property through the eyes of a wildfire safety expert.
The goal isn’t to create a perfectly manicured landscape overnight. It’s about making strategic, informed decisions that genuinely reduce your home’s vulnerability. You’ll be looking at your home and the surrounding land in distinct zones, each with its own set of priorities. This structured approach helps you focus your efforts where they matter most, ensuring the work you do has the greatest possible impact on your family’s safety and your home’s insurability. Taking the time to get organized now will save you time, money, and stress later on. Let’s walk through exactly what you need to do to build a solid foundation for your assessment.
Prepare Your Property Map
The first step is to get a bird's-eye view of your property. You need to see the defensible space zones as they relate to your home, and the easiest way to do this is with a map. A great, free online map tool lets you draw circles on a satellite image of your property, clearly marking the different zones you’ll need to assess. This simple visual exercise is incredibly powerful. It transforms the abstract concept of a "100-foot radius" into a tangible area you can see and plan for. By outlining these zones on a map, you create a clear blueprint for your work, helping you focus your attention and resources effectively from the very beginning.
Find Your Local Requirements
While state guidelines provide a great starting point, your local fire department often has its own specific, and sometimes stricter, rules. It’s essential to know what’s required in your immediate area. For example, state recommendations might suggest a 30-foot clearance for your home's most immediate zone, but your local district could require 50 feet. You should always check with your local fire department or fire protection district to get their official standards. Following these local regulations is not only key for compliance but also ensures your efforts provide the best possible protection based on regional conditions and risks.
Gather Your Property Information
Before you can assess your defensible space, you need to understand how it’s structured. Experts divide the area around your home into different zones based on their distance from the structure. These are often called the Home Ignition Zones, and they guide your clearing efforts. The immediate zone is the area from 0-5 feet out from your house. The intermediate zone covers the space from 5-30 feet out. Finally, the extended zone reaches from 30-100 feet, and sometimes up to 200 feet. Knowing these specific measurements helps you organize your assessment and create a clear, zone-by-zone action plan for managing vegetation and other potential fuels.
Common Misconceptions to Avoid
Many people delay creating defensible space because of a few persistent myths. One common belief is that homes in cities or suburbs aren't at risk. The truth is, wind-blown embers can travel a mile or more, igniting homes far from the main fire front. Another dangerous myth is that defensible space doesn't really work. On the contrary, data consistently shows that having a well-maintained defensible space is one of the most important factors in whether a home survives a wildfire. Taking action truly saves homes and gives firefighters a safe area to work in. Don't let misinformation stop you from protecting your property.
How to Assess Each Zone
Breaking down your property into manageable zones is the best way to start your assessment. Wildfire safety experts use a three-zone system to create a buffer around your home. Each zone has a specific goal, from keeping embers from igniting your house to slowing down an approaching fire. Let's walk through what to look for in each area.
Zone 0 (0-5 feet): Your Immediate Defense
Think of this five-foot perimeter as your home's last line of defense. This is the "ember-resistant zone," and your goal is to eliminate anything that could catch fire from flying embers. Start by removing all combustible materials right next to your foundation. Swap out wood mulch for non-flammable options like gravel or pavers. You’ll also want to clear away dead leaves from this area and move firewood piles and flammable patio furniture further from the house. According to CAL FIRE, creating this non-combustible area is one of the most effective steps you can take to protect your home.
Zone 1 (5-30 feet): Create a Lean, Clean Space
In the space between 5 and 30 feet from your home, your focus shifts to maintenance. This is your "lean, clean, and green" zone. The goal here is to create a well-irrigated and tidy landscape that won't easily carry a fire to your doorstep. Start by removing all dead plants, dry grass, and weeds. Prune trees to keep any branches at least 10 feet away from your roof and chimney. It's also important to create space between plants to stop fire from climbing from the ground up into the tree canopy. This careful landscaping disrupts a fire's path and gives firefighters a safer space to work.
Zone 2 (30-100 feet): Reduce Wildfire Fuel
This outer ring, extending from 30 to 100 feet, is all about reducing the fuel a wildfire needs to spread. While this area can have more natural vegetation, the key is to interrupt the flow of flammable material. Keep annual grasses mowed to a maximum height of four inches. You'll also want to create plenty of horizontal and vertical space between trees and shrubs. This doesn't mean you have to clear-cut the area; it's about strategic thinning. By breaking up the vegetation, you effectively slow a fire's advance and lower its intensity before it gets close to your home.
Factor in Topography and Wind
Your property's unique landscape plays a huge role in its wildfire risk. Fire travels much faster uphill, so if your home is on a slope, you need to extend your defensible space on the downhill side. Pay special attention to the area below any decks, ensuring there's no vegetation that could carry flames up to the structure. Prevailing winds are another critical factor, as they can carry embers far ahead of the main fire. Understanding your local wind and weather patterns will help you identify the most vulnerable parts of your property and focus your efforts where they'll have the biggest impact.
Get the Most From Your Assessment Tool
Once you’ve completed your initial assessment, the real work—and the real value—begins. Think of your defensible space tool not as a one-time report card, but as your ongoing partner in wildfire preparedness. It’s designed to help you see your property clearly, understand your specific risks, and turn that knowledge into a concrete plan. Using all the features at your disposal will make the process of protecting your home feel less overwhelming and more manageable. By tracking your work and creating a personalized plan, you can methodically improve your property’s safety and have the documentation to prove it.
Use Interactive Maps to See Your Property
A bird's-eye view can change your perspective entirely. The best assessment tools use interactive maps to draw your defensible space zones directly over a satellite image of your home. This visual aid is incredibly powerful because it removes all the guesswork. You can see exactly where the 5-foot, 30-foot, and 100-foot perimeters lie in relation to your house, deck, trees, and outbuildings. This helps you pinpoint potential trouble spots, like an overgrown shrubbery in Zone 1 or a woodpile that’s too close to the house in Zone 0. Some free online resources, like the Map Developers circle tool, can give you a basic idea, but an integrated assessment tool provides a much more detailed and actionable picture.
Understand Your Wildfire Risk Score
Your wildfire risk score is more than just a number; it’s a story about your property’s current vulnerabilities. Instead of just looking at the final score, take the time to understand what goes into it. A good assessment tool will break down the score, showing you how factors like roof material, vegetation type, and slope contribute to your overall risk. This insight is crucial because it helps you prioritize. You might discover that while your landscaping is in great shape, your wooden fence connecting directly to your house is a major hazard. Understanding these details is the first step toward making smart, impactful decisions and creating defensible space that truly protects your home.
Document Your Progress with Photos
A picture is worth a thousand words, especially when it comes to showing your hard work. As you clear brush, trim trees, and move flammable materials, get in the habit of taking before-and-after photos. This creates a visual log of your improvements, which is not only motivating but also serves as valuable proof for your insurance provider. Many digital assessment tools allow you to upload photos directly, linking them to specific action items in your plan. This keeps all your documentation organized in one place. If you’re ever unsure about your work, don’t hesitate to reach out to your local fire department; they are an excellent resource for guidance and support.
Track Your Improvements Over Time
Defensible space isn't a "set it and forget it" project. Grasses and weeds grow back, trees drop new needles, and weather can create new hazards. That’s why it’s so important to treat wildfire preparedness as an ongoing practice. A great assessment tool lets you save your reports and track your progress season after season. By regularly updating your assessment, you can see how your score improves and identify any new areas that need attention. This creates a historical record of your diligence, which is helpful for your own planning and for demonstrating your commitment to safety to your insurer. It turns a big project into a simple, repeatable maintenance routine.
Get a Personalized Action Plan
The ultimate goal of any assessment is to know exactly what to do next. A high-quality tool will translate your risk score and property data into a personalized, prioritized action plan. This checklist is your roadmap to a safer home. It should clearly outline specific tasks, like "Remove dead leaves from the roof and gutters" or "Trim tree branches so they are at least 10 feet from the chimney." By focusing on the most critical steps first, you can make the biggest impact with your time and effort. This targeted approach is key to effectively reducing home ignitions and giving your property its best chance of surviving a wildfire.
Create Your Defensible Space Action Plan
Once you have your assessment results, it’s time to turn that information into a concrete plan. Think of your defensible space score not as a final grade, but as a starting point for a clear, prioritized to-do list. A good digital tool will generate this for you, but the goal is always the same: to break down a big project into small, manageable steps. You don’t have to do everything at once. The key is to focus on what matters most and build momentum from there.
Your action plan should cover everything from routine yard work to potential structural upgrades. It helps you see where you can make the biggest impact quickly and what projects might require more planning or a bigger budget. By organizing your tasks, you can methodically improve your property’s resilience against wildfire. This proactive approach not only makes your home safer but also gives you a clear record of improvements, which is incredibly valuable when talking to your insurance provider. It’s about taking control and moving forward with confidence.
Prioritize High-Impact Fixes
Start with the changes that give you the most bang for your buck—and your time. Often, the most effective actions are also the simplest. Your first priority should be clearing the area immediately surrounding your home, known as Zone 0. This is where you can stop embers from finding a place to land and ignite. Focus on removing dead leaves from your roof and gutters, clearing away dry grass and pine needles from under your deck, and moving woodpiles at least 30 feet from your house. As CAL FIRE notes, you should "regularly clear dead or dry vegetation and create space between trees." These simple maintenance tasks create a critical buffer and are the foundation of a fire-safe property.
Plan Your Vegetation Management
Managing the plants on your property is an ongoing process, not a one-time fix. Your action plan should map out how you’ll tackle vegetation across all three defensible space zones. For Zone 0 (0-5 feet), the goal is to have zero flammable material. In Zone 1 (5-30 feet), you’ll want to create separation between trees and remove dead plants. For Zone 2 (30-100 feet), the focus is on reducing the overall density of vegetation. Create a seasonal checklist to stay on top of tasks like pruning trees, mowing dry grass, and clearing brush. Planning your fire-resistant landscaping makes the work feel less overwhelming and ensures your property stays prepared year-round.
Identify Structural Improvements
While landscaping is crucial, don’t overlook the structure of your home itself. This concept, often called "home hardening," involves making physical improvements to your house to help it withstand embers and radiant heat. Your action plan should include a list of potential upgrades. Simple fixes include installing fine mesh screens over vents to block embers and ensuring there are no gaps in your siding or roof flashing. Larger projects might involve replacing single-pane windows with more resilient dual-pane versions or upgrading to a fire-resistant roof. These improvements create a strong defense and give firefighters a safer space to work if a wildfire approaches your home.
Choose Fire-Resistant Materials
When you’re planning improvements or repairs, always opt for fire-resistant materials. This is especially important in the five feet closest to your home. Instead of wood mulch, which can easily ignite, use non-combustible options like gravel, pavers, or concrete. As the experts at Living With Fire recommend, "Use materials that don't burn easily, like gravel, concrete, or brick walkways." When it’s time to replace a fence, consider materials like metal instead of wood, especially if it attaches directly to your house. Making smart material choices during routine maintenance and upgrades is a practical way to build a more fire-resistant home over time.
Find Budget-Friendly Solutions
Protecting your home from wildfire doesn’t have to break the bank. Many of the most important defensible space tasks are free and simply require your time and effort. Regular maintenance like raking leaves, cleaning gutters, and trimming low-hanging branches costs nothing but makes a huge difference. For larger projects, look for ways to save. You can often rent tools you don’t own or team up with neighbors to share the cost of a wood chipper. It’s also worth checking for local wildfire mitigation grants or assistance programs. Your local fire department is a great resource and can tell you about any financial help available in your community.
Maintain Your Defensible Space Year-Round
Creating defensible space isn't a one-and-done project; it's an ongoing commitment to safety. Just like any other part of your home, your property’s landscape needs regular attention to stay fire-ready. Wildfire risk changes with the seasons as vegetation grows, dies, and dries out. Staying on top of these changes is the key to protecting your home year after year. By breaking down maintenance into manageable steps, you can build a routine that keeps your property safe and gives you lasting peace of mind.
Create a Seasonal Maintenance Checklist
Think of your defensible space like a garden—it needs tending throughout the year. A seasonal checklist makes this process feel less overwhelming. In the spring, focus on clearing away the dead leaves, branches, and debris that accumulated over winter. Summer is about maintaining what you’ve cleared and ensuring plants are properly hydrated. In the fall, your main job is to manage falling leaves and needles. Winter is a great time to prune trees and shrubs while they’re dormant. Regularly clearing this dry vegetation reduces potential fuel and helps maintain the critical buffer around your home. For more detailed guidance, CAL FIRE provides excellent resources on what to prioritize each season.
Reassess Your Property Regularly
Your landscape is always changing, so an annual walk-through is essential. Pick a date each year to reassess your property with fresh eyes. Check on tree growth, especially branches that might be getting too close to your roof or chimney. Look for new accumulations of dead plant material under decks or in corners. This is also a good time to check if local ordinances have changed. If you’re unsure about a specific area or need a professional opinion, don’t hesitate to contact your local fire department. Many offer free consultations and can provide expert advice tailored to your property’s unique features.
Keep Good Records of Your Work
Documenting your defensible space efforts is one of the smartest things you can do. It creates a clear record of your commitment to wildfire safety, which can be incredibly valuable when communicating with your insurance provider. Use a digital tool to take photos before and after your work, log the dates you complete tasks, and keep notes on your progress. This creates a verifiable history of your mitigation efforts. A platform like Defensible Space Score allows you to track your improvements over time, giving you a powerful tool to demonstrate your proactive approach to reducing wildfire risk.
Work With Your Neighbors
Wildfires don’t stop at property lines, which means your safety is connected to your neighbor’s, and theirs is connected to yours. If homes are close together, fire can easily jump from one structure to the next. Start a friendly conversation with your neighbors about creating a community-wide buffer. You can share resources, plan a neighborhood cleanup day, or work together on thinning out vegetation between properties. When everyone participates, the entire community becomes safer. Building a Firewise USA® site is a great way to formalize this collaboration and gain recognition for your shared efforts.
Share Your Report with Your Insurance Company
After you’ve put in the hard work to create and maintain your defensible space, the final step is to share your progress. Your defensible space report is a powerful tool for communicating with your insurance provider. In many high-risk areas, insurers need to see that homeowners are taking proactive steps to reduce wildfire risk. A detailed report does more than just say you’ve cleared some brush; it provides concrete, zone-by-zone evidence of your mitigation efforts, complete with photos and a clear risk score.
This documentation changes the conversation with your insurer. It shows you are a responsible property owner who is actively managing risk. For insurance companies, this data is crucial for making decisions about coverage and renewals. By providing a comprehensive report, you build a strong, evidence-based case for your home’s insurability, which can make all the difference in getting and keeping the coverage you need.
Prepare Your Documentation for Insurance
Think of your defensible space report as the official record of your wildfire mitigation efforts. It’s the proof that backs up all your hard work. Creating defensible space is a valuable and effective way to reduce the destructiveness of wildfires by lowering the risk of ignition, which is a critical factor in insurance assessments. A report from a digital tool organizes this crucial information into a professional format that insurers can easily understand. It should include a summary of your actions, before-and-after photos, and an updated risk score. This documentation demonstrates that you’ve taken specific, measurable actions to protect your property, turning your efforts into a tangible asset for your insurance review.
Meet Insurer Requirements with Confidence
Wondering if you’ve done enough to satisfy your insurance provider can be stressful. A thorough defensible space report helps remove that guesswork. Digital assessment tools are often designed around the same criteria that fire officials and insurance inspectors use, ensuring you address all the key requirements. When you use a tool that guides you through a complete inspection, you can be confident that you’re meeting the standards for insurance compliance. Instead of just hoping you’ve checked all the boxes, you’ll have a detailed record that proves it. This allows you to communicate with your agent confidently, knowing you have the documentation to back up your home’s improved resilience.
Share Your Results with a Single Click
Gone are the days of printing photos and mailing stacks of paperwork. Modern defensible space tools are built to make communication simple and efficient. With your report complete, you can share it directly with your insurance agent without any hassle. These platforms are designed for the efficient sharing of inspection results, making it incredibly easy to provide documentation to your insurance company. Often, you can send a professional, easy-to-read report directly to your agent’s inbox with just a single click. This streamlines the entire process, ensures your information is received promptly, and presents your hard work in a clear, compelling way.
How This Can Help Your Insurance Coverage
So, what does sharing your report actually mean for your policy? It can have a direct and positive impact. In many wildfire-prone regions, demonstrating proactive mitigation is becoming a key factor for insurers when deciding whether to renew a policy. A strong defensible space report can be the evidence that keeps you covered. Providing clear documentation of your compliance with defensible space requirements can enhance your insurance coverage and, in some cases, may even help with your premiums. By giving your insurer the data they need to see your property’s reduced risk, you are taking a critical step toward securing and maintaining affordable homeowners insurance.
Helpful Tools and Resources
Creating and maintaining defensible space is a big job, but you don’t have to figure it all out on your own. Plenty of experts and organizations are ready to help you protect your home. Tapping into these resources can make your action plan smarter, safer, and more effective. Think of them as your extended team in wildfire preparedness, offering the guidance and support you need to get the job done right.
Connect with Your Local Fire Department
Your local fire department is one of your best allies. These professionals understand the specific fire behavior, weather patterns, and vegetation in your neighborhood better than anyone. Many departments offer free consultations or property assessments to help you get started. Don't hesitate to contact your local fire department for tailored advice on setting up your defensible space. They can point you toward local programs, grants for vegetation removal, or chipper days that make the work easier and more affordable. Building this relationship is a key step in your home's defense.
Find the Right Online Assessment Tool
Digital tools can completely change how you approach your defensible space. A good assessment tool gives you a bird's-eye view of your property and a clear, data-driven path forward. Some local councils offer a free online map tool that helps you visualize the zones around your home where you need to work. The best platforms, like Defensible Space Score, go even further by analyzing your property’s unique features, providing a risk score, and generating a personalized action plan you can follow step-by-step to improve your home’s safety and insurability.
Tap into Community Resources
Your neighbors and local community groups are an incredible source of support and information. Organizations like the Fire Safe Council often provide excellent educational materials that explain why defensible space is the essential buffer you create between your home and surrounding vegetation. These groups host workshops, share tips on fire-resistant landscaping, and can connect you with trusted local contractors. Working together with your neighbors not only strengthens your own property’s defense but also creates a more resilient community for everyone.
Know When to Call a Professional
While there’s a lot of defensible space work you can do yourself, some tasks are best left to the pros. Large tree removal, steep slope clearing, and major structural upgrades require specialized equipment and expertise. If you feel overwhelmed or unsure how to handle a specific recommendation from your assessment, it’s time to call for help. Your local fire department can often provide assistance or guidance on when to hire a certified arborist, a fire-mitigation specialist, or a contractor. Investing in professional help ensures the job is done safely and correctly.
Make Your Defensible Space Last
Creating defensible space is a huge accomplishment, but the work doesn’t stop once the last branch is cleared. Think of it as a living part of your home maintenance routine, just like cleaning your gutters or checking your smoke detectors. Vegetation grows back, leaves and pine needles accumulate, and conditions change with the seasons. To be truly effective, your
The key is to turn what feels like a big, one-time project into a series of small, manageable habits. By avoiding common missteps, monitoring your property, working with your neighbors, and staying current on local guidelines, you can ensure the safety buffer you’ve worked so hard to create is always ready. This ongoing effort is what makes your defensible space a reliable, long-term asset for your home’s protection. It’s about maintaining a constant state of readiness, so you can have peace of mind year after year, knowing you've done your part to keep your home safe.
Avoid These Common Mistakes
One of the biggest mistakes homeowners make is treating defensible space as a one-and-done task. Forgetting to maintain the area allows fuel to build right back up. Another common error is simply moving flammable materials around instead of removing them. Piling cleared brush or firewood next to a shed just shifts the hazard from one spot to another. You also want to look up—overhanging tree limbs can drop embers directly onto your roof. To be effective, you must regularly clear dead vegetation and properly dispose of it, ensuring you create and maintain a true buffer around your home.
Monitor Your Property and Progress
Getting into a rhythm of regularly walking your property is the best way to stay ahead of maintenance. At the start of each season, take a walk through your defensible space zones and look for changes. Are there new weeds? Have tree branches grown closer to your home? Pay close attention to the home ignition zones, especially the area within five feet of your house. Using a digital tool to take photos and track your progress can make this even easier. It helps you document your work for insurance and turns a big job into a simple, routine check-up, preventing small issues from becoming major fire hazards.
Get Your Community Involved
Wildfire doesn’t stop at property lines, and your defensible space is stronger when your neighbors create it, too. A fire can easily spread from an unmanaged adjacent property, no matter how well-maintained your own is. Start a conversation with your neighbors about the importance of creating a community-wide buffer. You could organize a neighborhood clean-up day or share information from your local fire department. When everyone works together to maintain their defensible space, the entire community becomes safer and more resilient. It’s a team effort that benefits everyone.
Stay Up-to-Date on Local Rules
While state guidelines provide a great foundation, your local fire department or fire protection district often has its own specific requirements. These rules are tailored to your area’s unique landscape and risk factors, and they can be stricter than state-level regulations. It’s a good idea to check your local fire authority’s website or give them a call each year before fire season begins. Staying informed ensures your hard work meets the necessary standards, which is critical for both your safety and your ability to maintain homeowners insurance. You can find general guidance on CAL FIRE's defensible space page, but always confirm with your local officials.
Related Articles
- A Guide to Home Ignition Zone Assessment
- Your Guide to the FireSmart Home Ignition Zone
- Defensible Space Zones: A Homeowner's Guide
- Your Guide to the CAL FIRE Defensible Space Map
Frequently Asked Questions
Do I have to clear-cut my entire property to create defensible space? Not at all. The goal isn't to create a barren landscape, but to strategically thin out vegetation. Think of it more like smart gardening than clear-cutting. The focus is on removing dead material and creating space between plants and trees to slow a fire's path. A beautiful, well-maintained yard can also be a fire-safe one.
What's the single most important thing I can do to get started? If you're feeling overwhelmed, start with the five feet immediately surrounding your home. This is your most critical defense zone. Clear out any dead leaves, pine needles, and flammable mulch right up against your foundation. Move firewood piles and flammable patio furniture away from the house. This simple step creates a non-combustible barrier that can stop embers from igniting your home.
Will creating defensible space guarantee my insurance company won't drop me? While there are no absolute guarantees in the insurance world, providing proof of your mitigation work is one of the most powerful steps you can take. A detailed report showing your efforts demonstrates that you are actively reducing your property's risk. This makes your home a much better bet for insurers and can be a critical factor in their decision to maintain or renew your coverage.
How much time and money does this really take? It varies for every property, but many of the most effective tasks are free and just require your own time and effort. Regular maintenance like raking, mowing, and cleaning gutters costs nothing. For bigger jobs like tree removal, you may need to hire a professional, but you can plan and budget for those projects over time. The key is to start with the low-cost, high-impact fixes first.
Is this a one-time project, or do I have to do it every year? Think of it as ongoing maintenance, not a one-time fix. Vegetation grows back and seasons change, so your property needs regular attention to stay safe. The best approach is to create a simple seasonal checklist. A quick walk-through in the spring and fall can help you stay on top of new growth or debris, turning a huge project into a manageable routine.