Home Insurance Inspection: What They Look For
Get ready for your home insurance inspection with practical tips on what inspectors look for, common issues, and how to document your hard work.

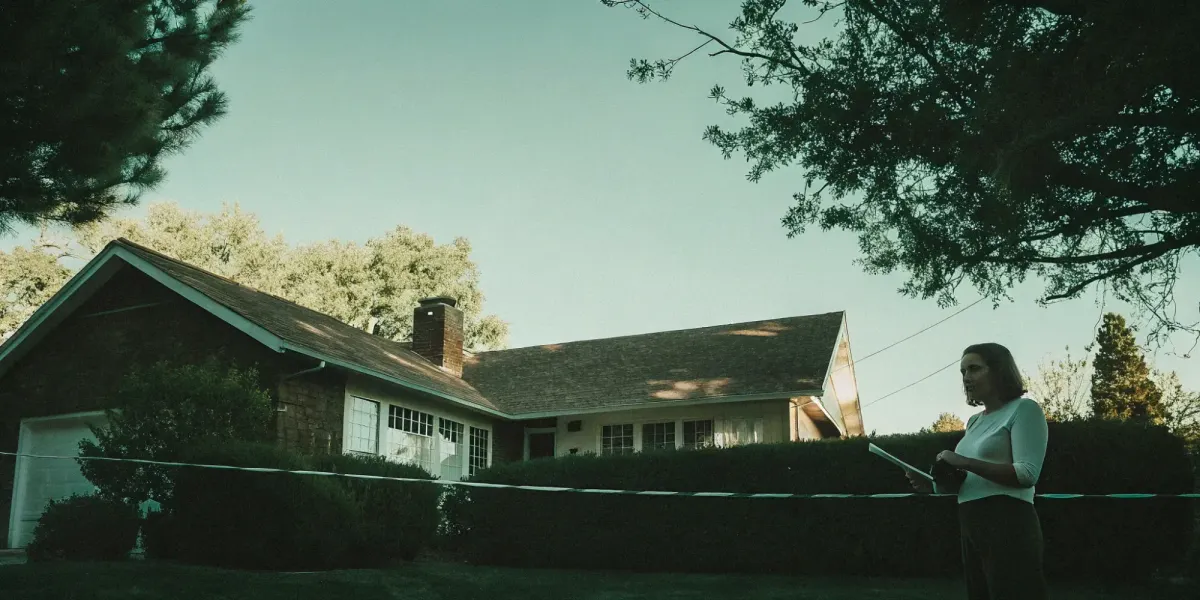
You’ve spent weekends clearing brush, cleaning your gutters, and creating a defensible space around your home. You’re doing everything you can to protect your property from wildfire. But when that notice for a home insurance inspection arrives, a new question pops up: will the inspector actually see and value all your hard work? This inspection is your chance to showcase your commitment to safety. It’s a critical moment that directly impacts your policy and premiums. This guide will help you get the credit you deserve. We’ll break down the inspector’s checklist, focusing on the wildfire mitigation efforts that matter most, and show you how to document your work.
Key Takeaways
- An inspection is a routine risk assessment: Your insurer isn't judging your decor; they're evaluating your home's major systems and structure to ensure your policy and premium are accurate.
- A proactive approach ensures a smoother process: By conducting your own walkthrough, making necessary repairs, and testing safety devices beforehand, you demonstrate responsible ownership and address potential issues on your own terms.
- Defensible space is your best defense: In wildfire-prone areas, creating and maintaining a clean, debris-free zone around your home is the most critical factor an inspector will evaluate for your safety and insurability.
What Is a Home Insurance Inspection?
A home insurance inspection can sound a little intimidating, but it’s really just a routine check-up for your house. Think of it as a way for your insurance company to get to know your property better. They send a professional inspector to evaluate your home, figure out its replacement cost, and spot any potential risks that could lead to a future claim. This isn't about judging your decorating skills; it's about understanding the nuts and bolts of your property. The information they gather is super important because it directly helps them calculate an accurate premium for your policy. By getting a clear picture of your home's condition and any potential hazards—especially wildfire risk in our communities—they can offer coverage that truly fits your situation.
Why Does My Insurer Want to Inspect My Home?
So, why does your insurer want to take a tour of your property? It all comes down to risk. Insurance companies need to assess the risks associated with insuring your home before they can commit to a policy. An inspector will look at key features like the age and condition of your roof, the state of your electrical and plumbing systems, and the overall structural integrity of the house. They're essentially trying to predict how likely it is that you’ll need to file a claim in the future. A well-maintained home with updated systems generally signals lower risk, which can translate to a more favorable premium for you.
When Should I Expect an Inspection?
Don’t worry, you won’t have an inspector showing up unannounced every year. These inspections usually happen for specific reasons. You can typically expect a call to schedule one if you’re buying an older home, switching to a new insurance provider, or if it’s been over a decade since your last inspection. Insurers also request them when they can’t accurately determine your home’s replacement value using public records alone. If an inspection is needed, the company’s assigned inspector will reach out to you directly to schedule a convenient time for the visit, so you’ll have plenty of notice to prepare.
Triggers for an Inspection
Inspections don’t just happen out of the blue. There are a few common scenarios that prompt your insurer to take a closer look at your property. You can typically expect a call if you’re buying an older home, changing insurance companies, or if it’s simply been a while—say, over a decade—since your last one. Insurers also need to see your property firsthand when they can’t get a clear picture of its replacement value from public records alone. In areas with high wildfire risk, insurers are especially diligent, so any of these events can easily trigger a request for an inspection to verify your home's condition and mitigation efforts.
Inspection Notice and Scheduling
The good news is that an inspector won't just show up on your doorstep unannounced. The process is professional and respectful of your time. When an inspection is required, the inspector assigned by your insurance company will contact you directly. They’ll work with you to schedule a convenient time for the visit, which means you’ll have plenty of notice to get your home ready. This heads-up is your opportunity to do a final sweep of your defensible space, test your smoke detectors, and gather any documentation of recent upgrades or repairs. It allows you to present your home in the best possible light, ensuring all your hard work is visible and accounted for.
Home Insurance Inspection Myths vs. Reality
There are a few common myths floating around about home inspections that can cause unnecessary stress. One is that the inspector will only look at the outside of your house. While some inspections are exterior-only, many are comprehensive and require the inspector to come inside to check on your home’s internal systems. Another big misconception is that you can simply refuse an inspection. While you technically have the right to say no, it’s almost always a bad idea. Refusing access can lead your insurer to cancel your policy or decline to renew it, leaving your property unprotected.
What Happens During the Inspection?
So, what actually happens when the inspector shows up? While it might sound intimidating, it’s a straightforward process designed to give the insurance company a clear picture of the property they’re covering. The inspector’s job is to verify that the home’s features and condition match what’s on your policy application and to identify any potential risks. The inspection can range from a quick exterior look to a detailed interior walkthrough. Knowing what to expect can help you feel prepared and confident.
Types of Home Insurance Inspections
Your insurance company can inspect your home in a few different ways, and the method they choose often depends on your property's age, location, and policy details. Some are quick exterior checks, while others are more in-depth. Knowing what to expect helps you prepare and feel in control of the process. Inspections generally fall into three categories: in-person, exterior-only, and digital. While they all aim to assess risk, each one works a little differently. Figuring out which type is scheduled for your home is the first step to a smooth and successful inspection.
In-Person Inspections
This is the most comprehensive type of inspection. An inspector will schedule a visit and will need to come inside to conduct a detailed walkthrough of your property. They’ll take photos of each room to document its condition and features, and they may look inside closets, check under sinks for leaks, and examine your electrical panel, furnace, and water heater. The goal isn't to be nosy; it's to get a complete picture of your home's internal systems and structural health. This thorough check-up gives the insurer the clearest understanding of the property they're covering.
Exterior-Only Inspections
In many cases, the insurance company only needs to evaluate the outside of your home. This is often called an exterior-only or “drive-by” inspection, and you may not even need to be home for it. The inspector will walk around the property, taking photos of the roof, siding, foundation, and other structures like decks or sheds. For homeowners in wildfire-prone areas, this is a critical moment. The inspector will be paying close attention to your defensible space, looking for hazards like overhanging branches, leaf litter on the roof, and flammable debris near the house. It’s a less intrusive process that provides vital information about your home's external risks.
Digital and DIY Inspections
More and more insurance companies are offering a convenient, modern alternative: the digital or self-inspection. Your insurer will typically send you a link to an app or website that guides you through taking specific photos of your home with your smartphone. This approach puts you in the driver’s seat, letting you complete the inspection on your own schedule. Some companies even offer a discount on your policy for doing it yourself. This is a fantastic opportunity to document and highlight all the wildfire mitigation work you’ve completed, making sure your insurer sees every single improvement you've made to protect your home.
What the Inspector Looks for Outside
The inspection usually begins with a walk-around of your property. The inspector is looking at the big picture—the overall condition of your home's exterior. This includes the roof, siding, foundation, and gutters. They’re checking for signs of damage or poor maintenance that could lead to future claims, like loose shingles or cracked siding. They’ll also note potential hazards, such as large tree branches hanging over your roof. Sometimes, this is all the inspection entails—a quick look from the street or a drive-by. For a more thorough assessment, however, they’ll want to take a closer look at the entire property, which sets the stage for the next steps of the inspection.
Features That Can Lead to Discounts
Think of the inspection as your chance to show the insurer all the ways you’re a responsible homeowner, which can translate directly into savings. Certain upgrades and features signal that you’re serious about reducing risk. For example, inspectors often note things that could earn you a discount, like a home security system or living in a secure community. Modern fire alarms and strong locks also demonstrate your commitment to safety and can help lower your premium. Beyond specific gadgets, the overall condition of your home speaks volumes. A well-maintained property with a solid roof and recent repairs shows an inspector that you're proactive about preventing issues. All these elements tell a story that your home is a lower risk, making a strong case for a better insurance rate.
What the Inspector Looks for Inside
If your inspection includes an interior review, the inspector will need to come inside. Their goal is to verify the details on your policy and check the condition of your home's core systems. They will likely look at your electrical panel, plumbing under the sinks, and your HVAC system to ensure they are in good working order and don't pose a fire or water damage risk. They’ll also confirm that safety features like smoke and carbon monoxide detectors are installed and functional. It’s common for inspectors to take photos of each room to document their findings. This can feel a bit strange, but it’s standard practice and helps them create an accurate report for the insurance underwriter.
Signs of Unpermitted Renovations
Inspectors are trained to spot additions or changes that don't quite fit the original blueprint of your home. Things like a garage converted into a bedroom or a new bathroom tucked into a basement can raise questions about whether the work was done with proper permits. Unpermitted renovations are a major red flag for insurers because there's no guarantee the electrical, plumbing, or structural work meets safety codes. If an inspector suspects unpermitted work, they might check public records to verify. Discovering these renovations is a serious issue that can jeopardize your insurability, potentially causing a provider to refuse coverage or even cancel your policy.
How Inspectors Check for Wildfire Risk
For those of us in wildfire-prone areas, this is a huge part of the inspection. The inspector will specifically evaluate your property's vulnerability to wildfire. They will focus on your home's immediate surroundings, looking for what fire professionals call defensible space. This means they’ll be checking for a clean, fire-resistant zone extending at least 30 feet from your foundation. They’ll look for accumulated leaves, pine needles, and other yard debris on your roof and in your gutters. They will also check for flammable materials stored too close to the house, like firewood piles, propane tanks, or oily rags. Creating this buffer is one of the most effective things you can do to protect your home.
How Your Inspector Reports Their Findings
Throughout the process, the inspector is taking detailed notes and photos. They aren't there to judge your decorating choices; they're creating a factual record of your property's condition and risk factors. This report is what the insurance company uses to confirm your home meets their underwriting guidelines. Typically, the inspector will contact you beforehand to schedule a convenient time for the visit, giving you a chance to ask any initial questions. They will compile all their observations into a formal report, which is then sent directly to your insurer. This document is the key piece of information that influences decisions about your policy's premium and continued coverage.
What's on the Home Insurance Inspection Checklist?
When an inspector walks through your property, they’re not just looking for cosmetic flaws. They’re trained to spot potential risks that could lead to future claims. Think of it as a health checkup for your home, where the goal is to identify and address problems before they become serious. Unlike a real estate appraiser who is focused on market value, an insurance inspector is focused entirely on risk. They want to understand the likelihood of a fire, a major water leak, or a liability claim happening on your property.
Understanding their checklist ahead of time is the best way to prepare. It helps you see your home through their eyes and focus your efforts on the areas that matter most to an insurer. They’ll look at everything from the big-ticket items like your roof and foundation down to the details of your electrical wiring. For homeowners in high-risk areas, they will also pay special attention to how well your property is prepared for specific threats like wildfires. By knowing what they’re looking for, you can proactively address issues and present your home in the best possible light, demonstrating that you’re a responsible partner in protecting your investment.
Structure, Foundation, and safety features
First and foremost, an inspector will assess the overall condition of your home’s structure. They’ll check the roof for any signs of damage, like missing shingles or soft spots, which could lead to leaks and water damage. The foundation will also get a close look for cracks or signs of shifting. Inside, they’ll note the general upkeep of the property. Beyond the structure, they’ll verify that essential safety features are in place and working correctly. This includes smoke detectors, carbon monoxide alarms, and fire extinguishers. Having these basics covered shows an insurer that you’re proactive about protecting your home and its occupants.
Specific Foundation Issues to Look For
Foundation problems are one of the biggest red flags in a home inspection, so it pays to know what an inspector is looking for. Before your appointment, do a quick walkthrough and check for tell-tale signs of trouble. Look for cracks in the drywall or plaster, especially long, jagged ones that run from the corners of doors and windows. Test the doors and windows in your home; if they stick, don't latch properly, or are difficult to open, it could signal that the frame has shifted. Other warning signs include uneven or sloping floors and visible gaps between the walls and the ceiling or floor. These issues suggest the house may be settling or shifting, which can be a costly problem to fix and a major concern for any insurer.
Electrical, Plumbing, and HVAC Systems
Your home’s major systems are a top priority during an inspection. Outdated or faulty electrical wiring is a significant fire hazard, so an inspector will check your electrical panel and look for any red flags. They’ll also examine the plumbing for signs of leaks, corrosion, or water damage, as water-related claims are incredibly common. Your heating, ventilation, and air conditioning (HVAC) system will be evaluated to ensure it’s been maintained and is functioning safely. An old, neglected furnace, for example, can pose a fire or carbon monoxide risk. Keeping these major systems in good working order is crucial for both your safety and your insurability.
Outdated Electrical Systems
An inspector will pay close attention to your home's electrical system because outdated or faulty wiring is a major fire hazard. They will typically start at your electrical panel, looking for signs of age or disorganization, and then check any visible wiring for red flags. Older homes might have knob-and-tube or aluminum wiring, which many insurers are hesitant to cover without updates due to the increased risk. The inspector isn't an electrician, but they are trained to spot these common issues. From an insurer's perspective, an old electrical system is a ticking time bomb for a potential fire claim, so they want to ensure everything is up to a safe, modern standard before issuing a policy.
Plumbing and Water Damage Risks
Water damage is one of the most common and costly reasons homeowners file insurance claims, so you can bet an inspector will be looking closely at your plumbing. They’ll examine the pipes under sinks, around your water heater, and in your basement or crawl space for any signs of trouble. They are on the lookout for active leaks, corrosion on pipes, and water stains on ceilings or walls, which indicate past problems. Even a tiny, slow drip can lead to significant issues like mold and wood rot over time. An insurer sees any sign of plumbing failure as a high probability for a future water damage claim, making this a critical part of the inspection.
Old Appliances
Your home’s major appliances, especially the heating, ventilation, and air conditioning (HVAC) system, will also be on the inspector's list. They will evaluate these systems to make sure they’ve been properly maintained and are functioning safely. An old, neglected furnace, for instance, can present a serious fire or carbon monoxide risk. Similarly, they’ll check your water heater for its age and any signs of leaking or corrosion at the base. A burst water heater can cause catastrophic flooding, so insurers want to see that these essential appliances are in good shape. Proving that you have a regular maintenance schedule can go a long way here.
Missing Safety Outlets (GFCI)
Inspectors will also check for modern safety features, including specific types of electrical outlets. They’ll look for Ground Fault Circuit Interrupter (GFCI) outlets in areas where water and electricity could mix, like kitchens, bathrooms, laundry rooms, and outdoor spaces. These outlets are designed to prevent severe electric shock by quickly shutting off power if they detect an imbalance in the current. If your home is missing GFCIs in these key locations, it’s a red flag for the inspector. It not only points to a direct safety hazard but also suggests that the home’s electrical system may not be up to current safety codes, increasing the overall risk profile of the property.
Spotting Fire and Wildfire Hazards
For those of us in wildfire-prone areas, this is a critical part of the inspection. An inspector will pay close attention to the immediate surroundings of your home, often called the "home ignition zone." They’ll look for flammable materials like dry leaves, pine needles, and overgrown vegetation close to the house. Creating a fire-resistant zone by clearing debris within at least 30 feet of your home is one of the most effective steps you can take. They will also assess your home’s building materials, noting whether you have a fire-resistant roof, non-combustible siding, or ember-resistant vents. These features can significantly reduce the chance of your home igniting from flying embers.
Your Home's Overall Condition and Security
Finally, an inspector is looking for signs of consistent, responsible homeownership. This means they’ll notice things that indicate good overall maintenance. A well-cared-for home is seen as a lower risk. They’ll check for things like peeling paint, clogged gutters, or cracked walkways that could cause a trip-and-fall claim. They’ll also look at your home’s security features, such as locks on doors and windows. Proving that you regularly take care of your property and address small problems before they become large ones sends a strong signal to your insurance provider that you’re a partner in managing risk.
Pest Infestations
An inspector isn't just looking for uninvited houseguests because they're creepy; they're looking for the damage these pests can leave behind. Termites, carpenter ants, and rodents can compromise your home's structural integrity, turning a small problem into a massive claim down the road. According to Progressive, inspectors are trained to spot signs of "pests (animals or insects)," which can include anything from damaged wood to droppings or nests. Evidence of an active or past infestation signals a higher risk to the insurer. If you’ve noticed any suspicious activity, it’s wise to address it with a professional before your inspection. This shows the insurance company that you’re on top of maintenance and actively protecting your property from preventable damage.
Mold and Water Damage
Few things raise a red flag for an insurance inspector faster than signs of water damage. Unchecked moisture from a leaky roof, faulty plumbing, or poor ventilation can lead to rot, structural issues, and the growth of mold. As the insurance experts at Openly point out, "signs of water damage or mold" are major concerns during an inspection. An inspector will be on the lookout for water stains on ceilings, musty odors, and peeling paint, as these are telltale signs of a bigger problem. Because mold remediation can be incredibly expensive and persistent water issues can cause catastrophic damage, insurers view these as significant risks that could lead to costly future claims.
Hazardous Materials
If you live in an older home, an inspector will also be mindful of potentially hazardous materials. While they won't conduct scientific tests, they are trained to recognize materials that were common in older construction, such as asbestos in insulation or "popcorn" ceilings and lead-based paint. According to Openly, the presence of "dangerous materials like asbestos or lead paint" is a liability concern for insurers. These substances can pose serious health risks, and their removal requires specialized, expensive procedures. An insurer needs to know if these materials are present, as it affects the home's risk profile and potential costs following a covered event like a fire or major storm that disturbs them.
Common Inspection Issues and Average Repair Costs
While every home is unique, inspectors tend to see the same types of issues pop up again and again. These are the red flags that signal a higher risk to an insurance company. Knowing what they are ahead of time gives you a huge advantage. You can walk through your own property, spot potential problems, and decide what to address before the inspector ever sets foot on your driveway. Tackling these common issues not only makes for a smoother inspection but also protects your home's long-term value and safety. Let's look at the four biggest areas inspectors focus on and what you can generally expect in terms of repair costs.
Foundation Cracks
Foundation problems are often considered the most serious issue an inspector can find. Because the foundation supports your entire house, even small cracks can signal major structural trouble that will only get worse over time. An inspector will look for cracks in the concrete slab or basement walls, doors that don't close properly, and uneven floors. These are all signs that the house may be shifting. While minor crack repairs might only cost a few hundred dollars, significant foundation repairs can easily run into the tens of thousands, making it a top concern for insurers. Addressing any visible foundation problems is a critical step in showing an inspector that your home is structurally sound and well-maintained.
Electrical Issues
Faulty or outdated electrical systems are a major fire hazard, which is why they are high on any inspector's checklist. In homes built before the 1970s, inspectors are particularly wary of things like old aluminum wiring, which can overheat, or panels that are overloaded with too many circuits. They will also check for ungrounded outlets or signs of DIY wiring that isn't up to code. The cost to fix electrical problems varies widely. A simple fix like installing a GFCI outlet might cost around $200, but a full panel upgrade or rewiring an entire house can cost anywhere from $5,000 to $15,000 or more, depending on the size of your home.
Plumbing Problems
Water damage is one of the most frequent and costly types of home insurance claims, so inspectors pay very close attention to your plumbing. They’ll look for active leaks under sinks, signs of water stains on ceilings, and corrosion on pipes. Older homes with galvanized pipes are a particular concern, as they are prone to rust and blockages that can lead to burst pipes. Even a slow, hidden leak can cause significant damage and mold growth over time. Repair costs can range from a couple of hundred dollars to replace a leaky faucet to over $10,000 for a complete home re-piping, making proactive plumbing maintenance a smart investment.
Roof Damage
Your roof is your home's primary shield against the elements, and a compromised roof is a direct path to expensive interior damage. During the exterior walk-around, an inspector will scan the roof for missing, cracked, or curling shingles. They’ll also check the condition of the flashing around chimneys and vents, as these are common spots for leaks to start. The age of the roof is a key factor; most asphalt shingle roofs have a lifespan of 20-25 years. While a minor repair might only set you back $300 to $1,500, a full roof replacement is a major expense, often costing between $8,000 and $20,000, which is why insurers are so focused on its condition.
How to Prepare for Your Insurance Inspection
An upcoming insurance inspection might feel a little nerve-wracking, but it’s really an opportunity to make sure your home is safe and your policy accurately reflects its value. Think of it as a partnership with your insurer to protect your property. A little preparation goes a long way in ensuring the process is smooth and successful. By taking a proactive approach, you can address potential issues on your own terms and demonstrate that you’re a responsible homeowner. Walking through your property with an inspector’s eye will help you spot the small things that can make a big difference, especially when it comes to wildfire safety.
Conduct Your Own Pre-Inspection
Before the inspector arrives, put on your detective hat and do your own walkthrough. This gives you a chance to see your home from their perspective and catch any red flags ahead of time. Grab a notepad and check the big-ticket items first: the roof, gutters, foundation, and siding. Look for any signs of damage or wear. Inside, examine your walls and ceilings for water stains, check that windows and doors seal properly, and take a peek in the attic and basement for any surprises. This simple home inspection checklist can help you identify areas that need attention before the official review.
Tackle Key Repairs and Maintenance
Once you’ve identified issues during your walkthrough, it’s time to handle them. Addressing repairs before the inspection shows your insurer that you’re committed to maintaining your property. Focus on fixing things that affect your home’s safety and structural integrity, like a leaky pipe, a loose handrail, or cracked window panes. If the inspector does find a problem you missed, it’s important to complete the required repairs promptly, especially if your insurer provides a deadline. Taking care of these fixes not only helps you secure your coverage but also protects your investment in your home for the long run.
Demonstrate "Pride of Ownership"
Beyond the big repairs, your home's general condition sends a powerful message. Insurers call this "pride of ownership," and it’s all about showing that you’re a proactive partner in protecting your property. A well-cared-for home is simply seen as a lower risk. This doesn't mean your house needs to be perfectly staged, but it does mean it should be clean, tidy, and free of obvious neglect. An inspector is actively checking for signs of poor maintenance that could lead to future claims, so simple actions like clearing yard debris, organizing storage areas, and ensuring walkways are clear can make a big impact. For homeowners in high-risk fire areas, this is especially critical. A clean, debris-free zone around your home is the clearest signal you can send that you take risk management seriously.
Create and Maintain Your Defensible Space
For those of us in wildfire-prone areas, defensible space isn't just a recommendation—it's essential. This is your home’s buffer zone against an approaching fire. Start by clearing a 5-foot zone immediately around your home of anything flammable. From there, extend your efforts out to at least 30 feet by removing dead leaves, pine needles, and dry brush from your yard and gutters. It’s also smart to move firewood piles and propane tanks well away from the house. A well-maintained defensible space is one of the most powerful wildfire mitigation steps you can take to protect your property and is a key factor inspectors look for.
Keep Records of Your Wildfire Mitigation
Don’t let your hard work go unnoticed. Documenting your mitigation efforts provides concrete proof to your inspector and insurer that you are actively reducing your property’s wildfire risk. Take clear before-and-after photos as you create your defensible space. Keep receipts for any professional services you’ve used, like tree trimming or brush removal. Organizing these records in a simple folder makes it easy to share with your inspector. This documentation shows your commitment and can be a critical factor in maintaining your fire insurance eligibility, demonstrating that you’re a proactive partner in risk reduction.
Test Your Alarms and Safety Devices
This is one of the quickest and most important checks you can do. Functional safety devices are non-negotiable for insurers and, more importantly, for your family’s well-being. Go through your home and test every smoke and carbon monoxide detector by pressing the test button. If any don’t sound, replace the batteries immediately. While you’re at it, check the pressure gauge and expiration date on your fire extinguishers. These simple actions show an inspector that you prioritize safety and have the necessary systems in place to respond to an emergency. It’s an easy win that contributes to a positive inspection outcome.
What Happens After the Inspection?
Once the inspector leaves your property, their work is done, but the process isn't over for you. They will compile their findings into a detailed report, complete with photos and notes, and submit it to your insurance company's underwriting department. The underwriters then review the report to verify that your home meets their eligibility guidelines and that the coverage amount aligns with the property's actual replacement cost. This review is a critical step where the insurer assesses the level of risk your home presents. Based on this report, the insurance company will decide on the next steps for your policy, which usually falls into one of a few categories. Don't be surprised if you don't hear back immediately; it can take a few days or even a couple of weeks for the underwriting team to complete their review and make a final decision.
What an Approval or Premium Change Means for You
In the best-case scenario, the inspection report confirms that your home is in great shape and poses a low risk. If this happens, your insurance company will likely approve your policy without any changes, and you won’t need to do anything else. Sometimes, the inspection might lead to a premium adjustment. For instance, if the inspector finds that your home’s replacement cost is higher than initially estimated, your premium might increase to reflect the higher coverage needed. Conversely, if you’ve made significant safety upgrades that weren’t on your initial application, like installing a fire-resistant roof, you could potentially see a discount.
What to Do If You're Asked to Make Repairs
It’s very common for an inspection to uncover a few issues that need attention. If the problems aren’t severe enough to warrant a cancellation, the insurer will often provide a list of required repairs or "recommendations." This might include things like trimming tree branches hanging over the roof, repairing a broken step, or clearing flammable debris from your defensible space. You’ll typically be given a specific timeframe, often 30 to 60 days, to complete the repairs. Think of this not as a penalty, but as a clear, actionable roadmap for making your home safer and ensuring it remains insurable.
Could Your Policy Be Changed or Canceled?
If the inspection reveals major problems or significant safety hazards, the insurance company may decide it cannot take on the risk. A severely damaged roof or faulty electrical wiring could lead to a notice of cancellation. In this situation, the insurer must provide you with a written explanation and give you time to find new coverage. More commonly, especially in wildfire-prone areas, an inspection might result in changes to your coverage. If your property has a high wildfire risk score due to poor defensible space, the insurer might increase your deductible or exclude certain types of damage from your policy.
Understanding "Force-Placed Insurance"
If your policy is canceled and you don't find a replacement, your mortgage lender will step in to protect their investment. They do this by purchasing a policy on your behalf, which is known as force-placed insurance. While this keeps you from violating your mortgage agreement, it’s far from an ideal solution. This type of insurance primarily protects the lender’s interest in the structure of your home and often provides very limited coverage for your personal belongings or liability. It’s also significantly more expensive than a standard policy you would buy on your own. Think of it as a costly, last-resort safety net for your lender, not a comprehensive protection plan for you.
Finding Coverage with High-Risk Insurers
Receiving a cancellation notice can be stressful, but it doesn’t mean your home is uninsurable. Your lender is required to send you multiple notices before they can force-place a policy, giving you a window to find new coverage. Start by looking for insurers that specialize in high-risk properties. These companies are more accustomed to underwriting homes in areas with wildfire exposure. Additionally, most states have a FAIR Plan (Fair Access to Insurance Requirements), which acts as an insurer of last resort for homeowners who can't find coverage elsewhere. When you approach these insurers, being prepared with documentation of your wildfire mitigation efforts—like a favorable Defensible Space Score report—can demonstrate that you are a proactive and responsible homeowner, which may improve your options.
How to Talk to Your Inspector
You generally won't communicate directly with the inspector after they leave. Your primary point of contact is your insurance agent or a representative from the insurance company. Once you receive the inspection report or any correspondence about your policy, review it carefully. If you have questions about a specific finding or don’t understand why a certain repair is required, reach out to your agent. They can act as a liaison with the underwriting department to get clarification. Your agent is your best resource to help you understand your policy and the insurer’s requirements.
What Not to Say During an Inspection
When the inspector is on your property, it’s natural to want to be helpful, but it’s often best to let the condition of your home do the talking. Try to avoid speculating about the cause of any potential issues. If the inspector points out a crack in the drywall, you don’t need to offer a theory on how it got there. It’s also smart to avoid making promises about future repairs. Instead of saying, “I’m planning to clear that brush next month,” you can point to the work you’ve already completed. Let your documented defensible space and other mitigation efforts show your commitment to safety. The goal is to answer questions honestly and directly without providing extra opinions that could complicate the assessment. Keeping the conversation professional and factual is the best way to ensure a smooth and accurate inspection.
What to Do If the Inspector Finds Issues
If your insurer sends you a list of required repairs, it’s important to act promptly. Start by creating a plan to address each item before the deadline. For minor fixes, you might be able to handle them yourself. For larger projects, like roof repairs or electrical work, you’ll want to find a qualified contractor. Be sure to document all the work you complete. Take before-and-after photos and keep copies of all receipts and invoices. Once you’ve finished the repairs, notify your insurance agent and submit your documentation as proof. This shows the insurer you’re proactive about maintaining a safe home and can prevent a cancellation.
Related Articles
Frequently Asked Questions
How is an insurance inspection different from a home appraisal? Think of it this way: an appraiser is focused on your home's market value for a sale or a loan, while an insurance inspector is focused entirely on risk. The inspector isn't trying to figure out what your home is worth to a buyer. Instead, they are identifying potential hazards—like an old roof or faulty wiring—that could lead to an insurance claim down the road. Their goal is to give the insurer a clear picture of the property's condition and safety.
Will my premium automatically go up after an inspection? Not at all. An inspection is simply a review of your property's condition. If your home is well-maintained and meets the insurer's guidelines, your premium will likely stay the same. In some cases, if you've made significant safety upgrades that the insurer wasn't aware of, your rate could even decrease. A premium increase typically only happens if the inspection uncovers significant new risks or determines that your home's replacement cost is higher than your current coverage amount.
Do I need to be home for the inspection? It depends on the type of inspection. For a simple exterior or "drive-by" inspection, you don't need to be present. However, if the insurer has scheduled a full interior and exterior review, you or another trusted adult will need to be there to let the inspector inside. It can be helpful to be there yourself, at least at the beginning, to answer any questions the inspector might have about your home's systems or recent updates.
What’s the single most important thing I can do to prepare for wildfire risk? Without a doubt, focus on creating and maintaining your defensible space. This is the buffer zone around your home that can slow or stop a wildfire. Start by clearing all flammable materials—pine needles, dead leaves, dry grass—within the first five feet of your foundation. From there, continue thinning out vegetation and removing yard debris for at least 30 feet. This is the number one thing an inspector will look for in a high-risk area and the most powerful step you can take to protect your property.
What should I do if I disagree with the inspector's findings? If you receive the inspection report and believe it contains a factual error, your first step is to contact your insurance agent. Don't try to track down the inspector directly. Gather any evidence you have to support your position, such as photos, receipts from recent repairs, or a report from a certified professional. Present this information clearly to your agent, who can then communicate with the underwriting department to review the discrepancy and work toward a resolution.